![Coimbatore-Annapoorna-Sambar-Recipe-tiffin-sambar]()
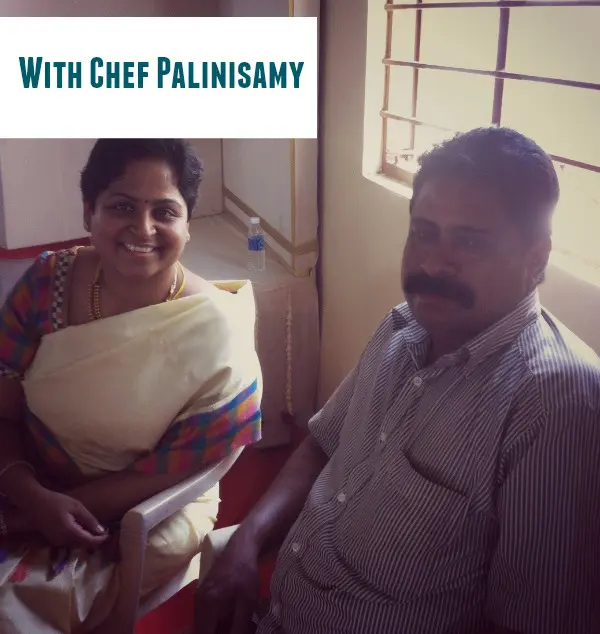
I get at least a couple of mails a month asking for Annapoorna sambar recipe as I am from Coimbatore. Everyone in Coimbatore loves the food from this iconic Annapoorna hotel. I am no different. Their Sambar is one of the best. I had tried different recipes but could not nail it. Then this happened. I was talking about my sambar quest to Prema akka (Vinodhs aunt) and she told she knows someone who can give us the recipe. She told me that one Mr. Palinisamy had worked as a cook in their house in the 80’s before moving to Annapoorna as a chef. She told me that she will definitely get hold of him for me. And she did. I met him at a function recently where he was in charge of the kitchen. Mr. Palanisamy is a dhoti clad chef with prominent brown eyes and a big mustache. His eyes are very unique. You will never forget him once you have met him. As soon as I met him, we started talking. He told that he started cooking at the age of 12. He worked at the hotel for 27 years. He now runs his own food and catering service at Coimbatore. His food rocks. If you are in Coimbatore and have a party at home, try Mr. Palanisamy’s food. You can reach him at Cell:9698488764, Office: 9344680106. So here is how to do the iconic Sambar at home.
![Coimbatore-Annapoorna-Sambar-Recipe-palanisamy]() A note on the quantity of vegetables to the dal.
A note on the quantity of vegetables to the dal.
We are going to use half a cup of toor dal for this recipe, which is 125 ml or roughly about 100 grams. We need to use 200 grams of drumstick for this recipe. About 2 drumsticks.
![Coimbatore-Annapoorna-Sambar-Recipe-drumstick]()
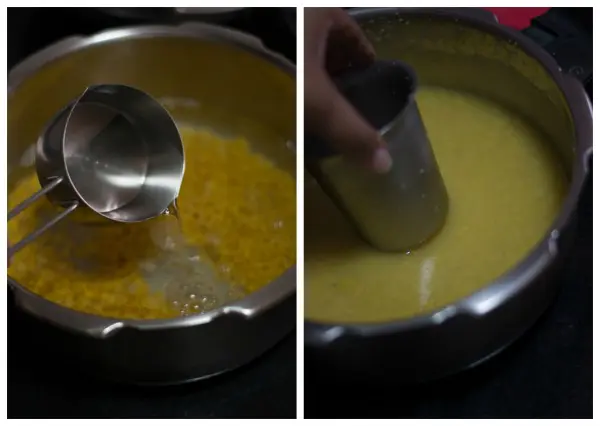
Wash and soak 1/2 a cup of toor dal in 2 cups of water for 20 minutes. Pressure cook the dal with the water for 6 whistles. Remove from heat and wait for the pressure in the cooker to release naturally. Use the back of the tumbler to mash the dal. Set the dal aside to a bowl.
![Coimbatore-Annapoorna-Sambar-Recipe-dal]()
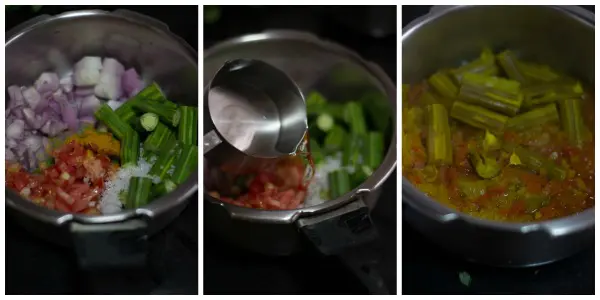
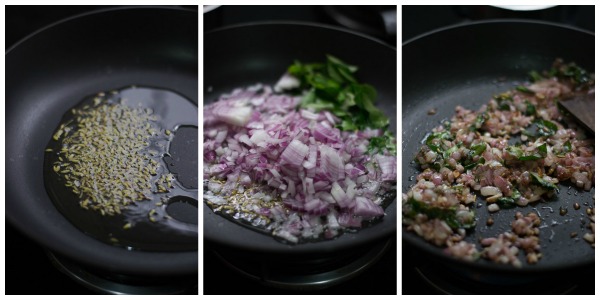
In the same cooker add in the drumsticks, diced onion, diced shallots (small onion) and tomatoes. Add one cup of water, a teaspoon of salt and a teaspoon of turmeric. Cook for 4 whistles. Remove from heat and wait for the pressure in the cooker to release naturally. Set aside.
![Coimbatore-Annapoorna-Sambar-Recipe-veggies]() Now for the Sambar Masala
Now for the Sambar Masala
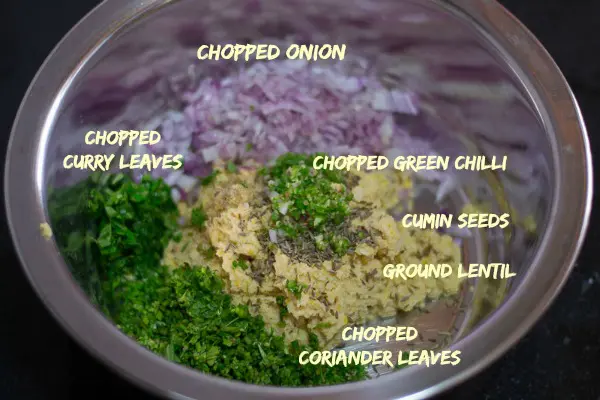
Get all the ingredients listed below ready before you proceed. We will need a dozen ingredients namely coriander seeds, cumin seeds, pepper, fenugreek seeds, chana dal, urad dal, curry leaves, dry red chillies, asafoetida, coconut, jaggery and the tamarind.
A note on jaggery and tamarind.
The quantity of jaggery and tamarind has to be equal.
![Coimbatore-Annapoorna-sambar-masala]()
Heat oil in a pan and add in the coriander seeds, cumin seeds, pepper, fenugreek seeds, chana dal and urad dal. Fry for a minute. Once the chana dal is brown, add in the curry leaves, dry red chillies, asafoetida, coconut, jaggery and the tamarind. Fry for 30 seconds. Remove from heat.
![Coimbatore-Annapoorna-Sambar-Recipe-masala]()
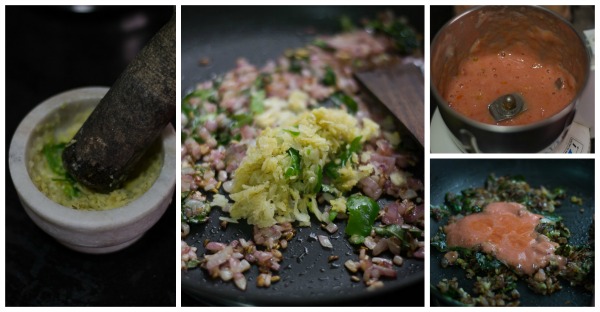
Grind the mixture with half a cup of water to a paste. Let the paste be very slightly coarse. Set aside.
![Coimbatore-Annapoorna-Sambar-Recipe-grind]()
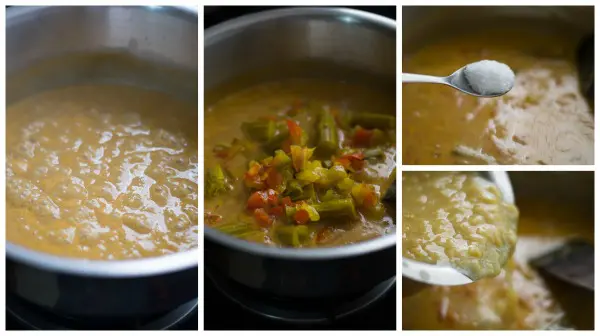
Take a heavy bottomed pan and add in the ground masala and one cup of water. Let it come to a boil on medium flame. Once its boiling, add in the cooked vegetables along with the water used for cooking. Add in the salt. Let it boil for 2-3 minutes on medium flame. Add in the cooked dal and let it continue to boil for 2-3 minutes.
![Coimbatore-Annapoorna-Sambar-Recipe-cook]()
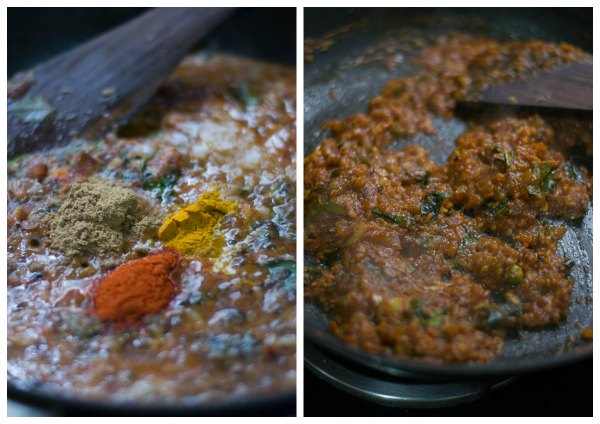
When the dal is cooking, we will do the tempering for the sambar. Heat oil in a kadai and add in the mustard seeds when the oil is hot. Add in the curry leaves and switch off the flame. Add in 1/2 teaspoon of red chilli powder and immediately pour it on the sambar. The red chilli powder might burn if kept in the oil for too long. So have an eye on the kadai. Add in the coriander leaves and a tablespoon of ghee. Switch off the flame.
![Coimbatore-Annapoorna-Sambar-Recipe-temper]()
Coimbatore Annapoorna Style Hotel Tiffin Sambar is ready!
Coimbatore Annapoorna Hotel Sambar Recipe
Author: Kannamma - Suguna Vinodh
Recipe type: Side Dish
Cuisine: South Indian, Tamilnadu
- ½ cup Toor Dal
- 2 Cups Water
- 2 Drumsticks
- 1 onion, diced
- 10 shallots (small onions), diced
- 1 Tomato, diced
- 1 teaspoon salt
- 1 teaspoon turmeric
- 1 cup water
- 2 teaspoon sesame oil (gingely oil)
- 2 teaspoon coriander seeds
- ½ teaspoon cumin seeds
- 5 black pepper corn
- 5 fenugreek seeds
- 2 tablespoon chana dal
- 1 tablespoon urad dal
- 1 sprig curry leaves
- 3 dry red chillies (gundu variety)
- ¼ teaspoon Asafoetida (hing)
- 3 tablespoon coconut
- 1½ teaspoon jaggery
- gooseberry size tamarind
- ½ teaspoon salt
- 4 stalks coriander leaves, chopped
- 1 tablespoon ghee
- 1 teaspoon sesame oil (gingely oil)
- ½ teaspoon black mustard seeds
- 2 sprigs curry leaves
- ½ teaspoon red chilli powder
- Wash and soak ½ a cup of toor dal in 2 cups of water for 20 minutes. Pressure cook the dal with the water for 6 whistles. Remove from heat and wait for the pressure in the cooker to release naturally. Set aside.
- In the same cooker add in the drumsticks, diced onion, diced shallots (small onion) and tomatoes. Add one cup of water, a teaspoon of salt and a teaspoon of turmeric. Cook for 4 whistles. Remove from heat and wait for the pressure in the cooker to release naturally. Set aside.
- Heat oil in a pan and add in the coriander seeds, cumin seeds, pepper, fenugreek seeds, chana dal, urad dal. Fry for a minute. Once the chana dal is brown, add in the curry leaves, dry red chillies, asafoetida, coconut, jaggery and the tamarind. Fry for 30 seconds. Remove from heat.
- Grind the mixture with half a cup of water to a paste. Let the paste be very slightly coarse. Set aside.
- Take a heavy bottomed pan and add in the ground masala and one cup of water. Let it come to a boil on medium flame. Once its boiling, add in the cooked vegetables along with the water used for cooking. Add in the salt. Let it boil for 2-3 minutes on medium flame. Add in the cooked dal and let it continue to boil for 2-3 minutes.
- Heat oil in a kadai and add in the mustard seeds when the oil is hot. Add in the curry leaves and switch off the flame. Add in ½ teaspoon of red chilli powder and immediately pour it on the sambar. The red chilli powder might burn if kept in the oil for too long. So have an eye on the kadai. Add in the coriander leaves and a tablespoon of ghee. Switch off the flame.
3.4.3177
The post Coimbatore Annapoorna Hotel Style Sambar Recipe appeared first on Kannamma Cooks.


 At this stage, If using Homemade coconut milk – Add in one cup of first pressed thick home made coconut milk and one a cup of water. If using store-bought canned coconut milk – Add in 2 cups of canned coconut milk. Add in the seer fish steaks. Cover the pan with a lid and let it simmer in low flame for 7-8 minutes. Simmering the curry in low flame is key to avoid the coconut milk from curdling.


 For the filling

 For the BUN!


 A note on the quantity of vegetables to the dal.
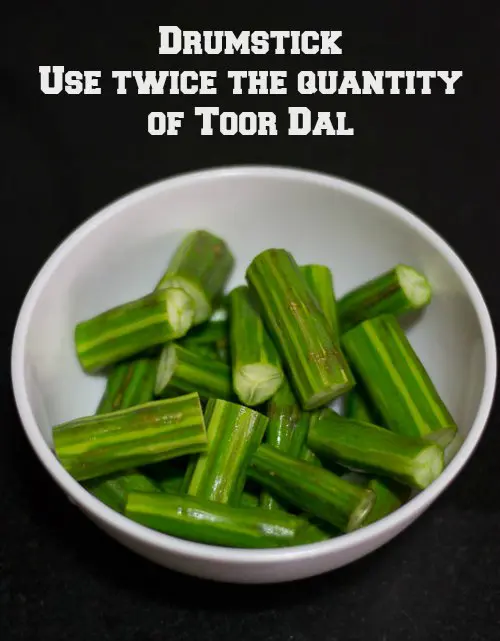
 Now for the Sambar Masala
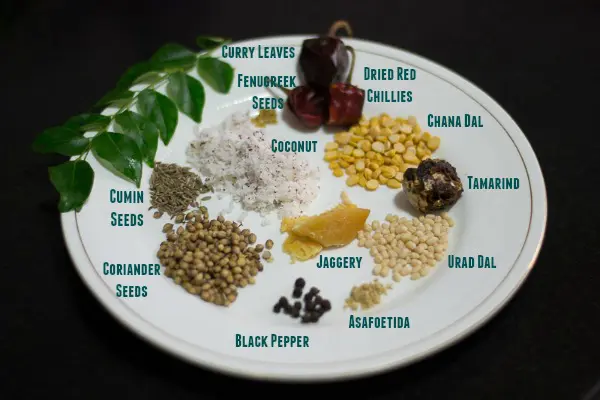


 Now lets make an assembly line.
 #Shallow Fry Method
 #Air fryer Method.


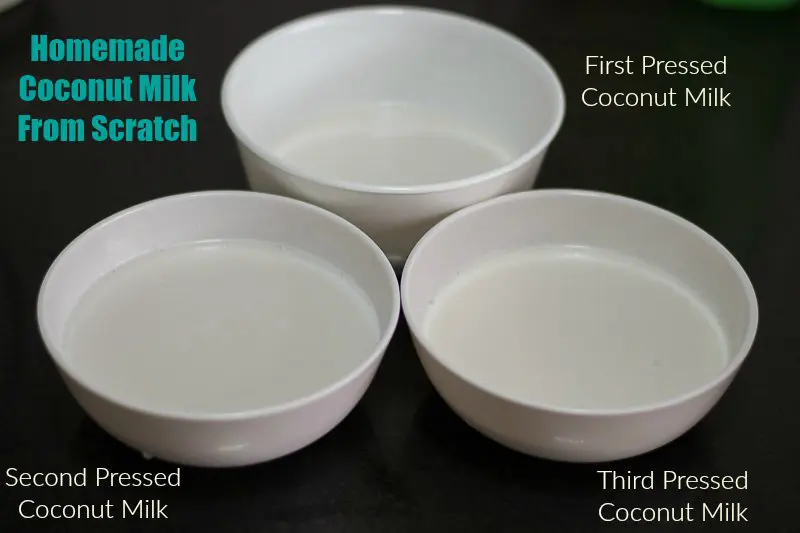
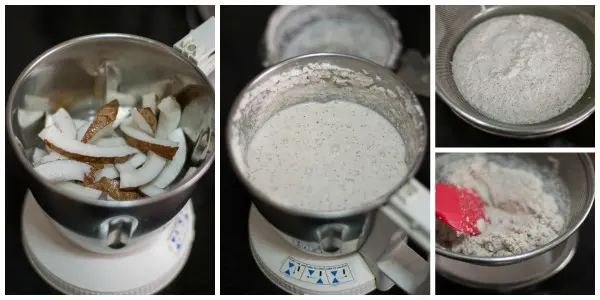 Second Pressed Coconut Milk
 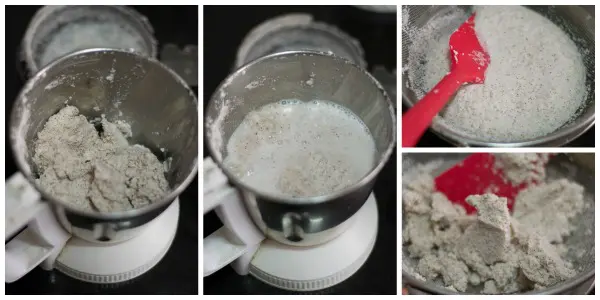 Third Pressed Coconut Milk – Final Milk
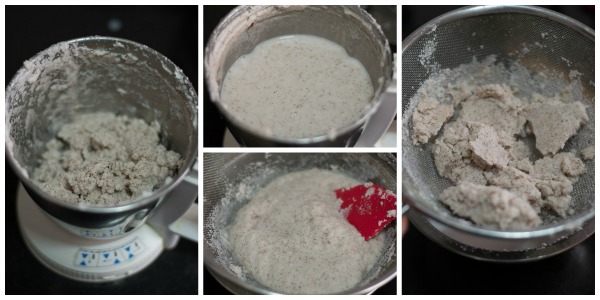


 Tempering


 Things to keep in mind while making this Burfi