Quantcast
Channel: Kannamma Cooks
Viewing all 1073 articles
Browse latest View live

Javvarisi Payasam

$
0
0

Tapioca pearl pudding - Indian Tamilnadu style Javvarisi payasam. Easy recipe #tapioca #pudding #payasam #pearl

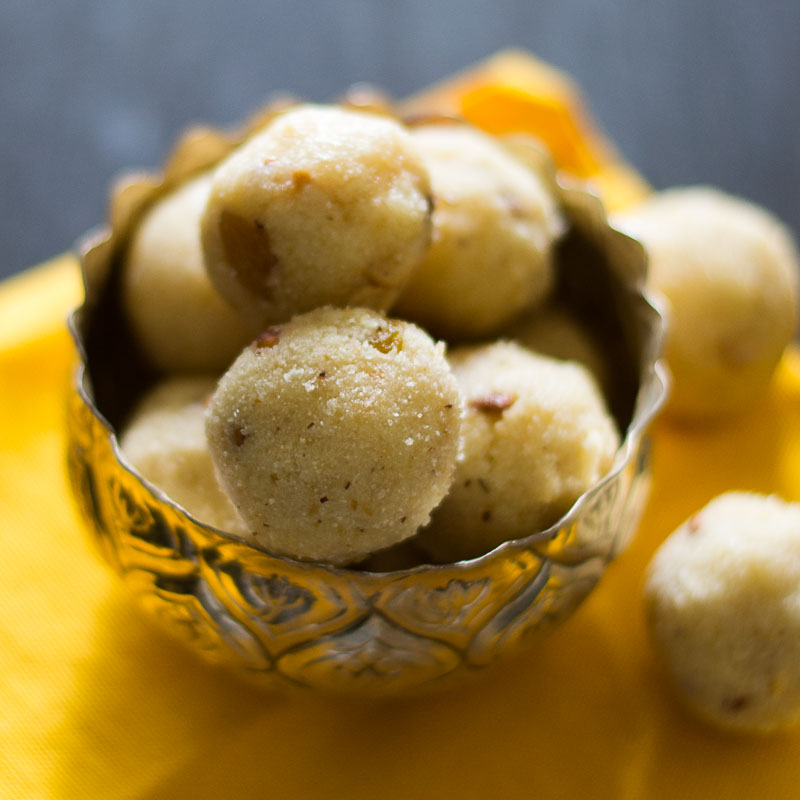
Javvarisi Payasam – Sabudana Kheer – Tapioca pearl pudding recipe.
When I was young, this was the only payasam I would eat. The texture of the Javvarisi/tapioca pearls was something i loved and still do. The soft and yet firm Javvarisi pearls coated with reduced milk is truly a treat. This payasam is a must during festival times and my grandmother would eat this payasam with appalam/poppadum. the salty sweet thing was something she really liked. Here is how to do a very simple Javvarisi Payasam.

Wash the Javvarisi in running water for two to three times. Soak the washed Javvarisi in water and set aside. Let it soak for atleast one hour. The Javvarisi pearls would absorb the water and double in volume. After an hour. Drain the water. Set aside.

Tamilnadu-javvarisi-payasam-recipe-soak

Boil 500 ml of milk with the soaked and drained Javvarisi for 15-20 minutes on low flame stirring once in a while so it does not scorch at the bottom. After 15 minutes, taste the Javvarisi. It should be soft yet firm. If its still hard, let it boil for another 5 minutes. The mixture would also have become thick by now. If its very thick dilute with some milk if required.

Tamilnadu-javvarisi-payasam-recipe-cook-sabudana

Add in half a cup of sugar and let it boil for 2-3 minutes. Add in the sugar only after the Javvarisi has fully cooked. Switch off the flame and add in powdered cardamom. I like to grind the cardamom in a mortar and a pestle. Add in a pinch of salt. Mix well to combine. Set aside.

Tamilnadu-javvarisi-payasam-recipe-cardamom

Heat a small pan and add in the ghee. Add in the broken cashew nuts and fry on a low flame. When the nuts are slightly brown, add in the raisins and wait for the raisins to plump up. Switch off the flame and add it to the payasam. Mix well to combine.

Tamilnadu-javvarisi-payasam-recipe-ghee

Payasam is ready. I like to serve this payasam a little warm.

Tamilnadu-javvarisi-payasam-recipe-done

Javvarisi Payasam
 
Prep time
Cook time
Total time
 
South Indian Tamilnadu style Javvarisi Payasam. Easy and very simple recipe. Javvarisi Payasam - Sabudana Kheer - Tapioca pearl pudding recipe.
Author:
Recipe type: Dessert
Cuisine: South Indian, Tamilnadu
Serves: 3 cups
Ingredients
For the Payasam
  • ½ cup Javvarisi - sabudana - tapioca pearls
  • 500 ml milk
  • ½ cup sugar
  • 4 cardamom, seeds ground to a fine powder
  • a pinch of salt
For the tempering
  • 2 tablespoon ghee
  • 10 Cashewnuts
  • 15 raisins
Instructions
For the Payasam
  1. Wash the Javvarisi in running water for two to three times. Soak the washed Javvarisi in water and set aside. Let it soak for atleast one hour.
  2. Boil 500 ml of milk with the soaked Javvarisi for 15-20 minutes on low flame stirring once in a while so it does not scorch at the bottom.
  3. Add in half a cup of sugar and let it boil for 2-3 minutes.
  4. Switch off the flame and add in powdered cardamom. Add in a pinch of salt. Mix well to combine. Set aside.
For the tempering
  1. Heat a small pan and add in the ghee. Add in the broken cashew nuts and fry on a low flame. When the nuts are slightly brown, add in the raisins and wait for the raisins to plump up. Switch off the flame and add it to the payasam. Mix well to combine.
  2. Serve warm.

The post Javvarisi Payasam appeared first on Kannamma Cooks.


Nei Appam – Unniyappam

$
0
0

Nei Appam - Unniyappam. Rice flour balls flavoured with dry ginger powder and cardamom. #Glutenfree #Indian Festival Food #sweets #desserts

Nei appam reminds me of so many good memories. Nei appam is made in Tamilnadu for Karthigai Deepam festival. I love Karthigai Deepam for several reasons. When we were young, the diwali crackers would be rationed between me and my brother and some would be kept in the loft safely for Karthigai Deepam. Karthigai deepam meant bursting all the stored crackers. The entire neighborhood would be lit with little mud lamps and its such a beautiful sight. My aunt would send us these Nei Appam and I used to wait for these. Here is my aunts recipe for Nei Appam. Its also called as Unniyappam in Kerala.

Sukku or dry ginger powder is a very important ingredient for making this Nei Appam. There is a saying in Tamil which my aunt says. சுக்குக்கு மிஞ்சிய வைத்தியமில்லை, சுப்பிரமணியனுக்கு மிஞ்சிய தெய்வமுமில்லை. It means “There is no greater medicine than dry ginger, there is no greater lord than Lord Subramanya.” Karthikai Deepam is a Hindu Tamil Festival of Lights. Karthi means Lord Subramanya (Muruga). So if you are doing Nei Appam for Karthigai Deepam, be sure to add dry ginger powder.

Here is how to do Nei Appam.

Boil Jaggery with water until the jaggery is fully dissolved and the mixture comes to a rolling boil. Switch off the flame and strain to get rid of dirt and impurities that may be in the jaggery. Almost always there is some fine sand particles present in jaggery. Keep the jaggery syrup aside.

nei-appam-unniyappam-jaggery

Remove the seeds from cardamom and grind the seeds to a smooth powder using a mortar and pestle. Add it to the jaggery syrup.

nei-appam-unniyappam-cardamom

Now add in the important flavoring ingredient for this recipe. Dry Ginger. Add in a teaspoon and mix well.

nei-appam-unniyappam-sukku

Take two very ripe bananas and mash it into a paste. Add it to the jaggery syrup.

nei-appam-unniyappam-add-bananas

Now add in the rice flour and baking soda. Mix well. The batter will be thick. Set aside. Let the batter rest for 2 hours.

nei-appam-unniyappam-rice-flour

After the rest, lets make Nei Appam. Heat the paniyaram pan until hot. Add a teaspoon of ghee in each of the mold. I like to use an ice cream scoop to spoon out the batter into the paniyaram pan as its a very thick and sticky batter. Icecream scoop makes it easy and mess free. If using a spatula, use another spoon to release the batter from the spatula. Cook the nei appam on both sides until crisp and brown.

nei-appam-unniyappam-fry-batter

Remove off the pan and allow it to let it cool. Nei appam is ready.

nei-appam-unniyappam

Nei Appam - Unniyappam
 
Prep time
Cook time
Total time
 
Recipe for Nei Appam made during Karthigai deepam festival. Nei Appam is also called as unniyappam in Kerala.
Author:
Recipe type: Festival Dishes
Cuisine: South Indian, Tamilnadu
Serves: 20-25 appams
Ingredients
  • Measurements used - 1 cup=250 ml
  • ¾ cup Jaggery
  • ½ cup water
  • 5 Cardamom pods
  • 1 teaspoon dry ginger
  • 2 ripe bananas
  • 1 cup rice flour
  • ½ cup ghee for frying appam
Instructions
  1. Boil Jaggery with water until the jaggery is fully dissolved and the mixture comes to a rolling boil. Switch off the flame and strain to get rid of dirt and impurities that may be in the jaggery. Almost always there is some fine sand particles present in jaggery. Keep the jaggery syrup aside.
  2. Remove the seeds from cardamom and grind the seeds to a smooth powder using a mortar and pestle. Add it to the jaggery syrup.
  3. Now add in the important flavoring ingredient for this recipe. Dry Ginger. Add in a teaspoon and mix well.
  4. Take two very ripe bananas and mash it into a paste. Add it to the jaggery syrup.
  5. Now add in the rice flour and baking soda. Mix well. The batter will be thick. Set aside. Let the batter rest for 2 hours.
  6. After the rest, lets make Nei Appam. Heat the paniyaram pan until hot. Add a teaspoon of ghee in each of the mold. I like to use an ice cream scoop to spoon out the batter into the paniyaram pan as its a very thick and sticky batter. Icecream scoop makes it easy and mess free. If using a spatula, use another spoon to release the batter from the spatula. Cook the nei appam on both sides until crisp and brown.
  7. Remove off the pan and allow it to let it cool. Nei appam is ready.

The post Nei Appam – Unniyappam appeared first on Kannamma Cooks.

Dal Fry – Thanjavur Thalicha Paruppu – South Indian Moong Dal Fry

$
0
0

thanjavur-dal-fry-recipe

I had this Dal Fry at a restaurant in Thanjavur during our temple trip last week. The dal was so warm and comforting with rice after a long sunny day at the temple. Thanjavur is known for its vegetarian fare called ilai saapadu. Its the thaali feast served for lunch on a banana leaf. This recipe is inspired from the dal we ate in Thanjavur.

Thanjavur brihadeshwara temple is my most favorite temple. The temple just completed its 1000 years. There are so many other temples that are big and grand. But this one is the best as its made entirely of Granite. No soap stone, No lime stone – just 100% Granite. In an age of soft iron and no modern tools, the intricacy of the structure in granite is awe inspiring. Its truly the big temple.

thanjavur-big-temple

Raja Raja Chola is my favorite hero. They say that this might be the only recorded painting of him with his guru Karuvurar. Karuvurar means a person with no rebirth. Hinduism believes in rebirth.

thanjavur rajaraja picture

There were so many things that kept me looking curiously for hours. Some of them were the paintings. These paintings are 1000 years old. If you look at the paintings, you can see a hand bag, ladies in cut shoes, and Raja Rajas court wives (in transparent clothes) praying at Chidambaram. And all this was 1000 years ago.

thanjavur paintings

There is an edifice which has a man with a hat at the Thanjavur temple. It might be a proof that the Cholas traded with the Europeans as they say that the hat resembles the dutch hat. Another theory is that this guy is a Chinese Buddhist monk as Buddhism was wide spread in India during that time. Whatever it was, a man with a hat at a temple – unique!

thanjavur european man

We saw so many sculptures with intricate work at the Lord Subrahmanya tower. We had so much fun. Soooo much fun! No school, no rules, no timings, no alarm clocks. Thats the nice thing about vacation.

Now back to the recipe. This is a very simple dal. The dal is tempered two times.

Cook the Dal:
Boil half a cup of split moong dal with 2 cups of water in a pressure cooker for 4 whistles. Switch off the flame and allow the pressure to release naturally. Set aside.

First Tempering:
Heat sesame oil in a pan and add in the cumin seeds. Let it splutter. Then add in the chopped shallots (small onions) and the garlic. Pound the garlic with the skin 2-3 times and add it whole to the pan. It gives a nice aroma. Let it cook for a couple of minutes.

South-indian-dal-fry

Now add in the finely chopped tomatoes, one cup of water and a teaspoon of salt. Let it cook for 5 minutes in medium flame until the tomatoes are nicely cooked and mashed up.

thanjavur-dal-fry-tomatoes

Now add the cooked dal and half a cup of water. If the consistency of the dal is too thick, add a little more water. The dal should not be too thick like mashed potato. We are looking at a pouring consistency. Let the dal come to a boil. Add in the coriander leaves and switch off the flame.

South-indian-dal-fry-add-dal

Now lets do the second tempering.
Here are the tempering ingredients.
South-indian-dal-fry-tempering-ingredients

Heat two teaspoon of ghee in a small kadai and add in the cumin seeds, curry leaves and the dried red chillies. Let it splutter. Once the spluttering sound has subsided, switch off the flame and add in the turmeric powder, asafoetida (hing) and red chilli powder. Mix well to roast the powders. Add it to the dal and serve hot with rice.

South-indian-dal-fry-add-tempering

Thanjavur Thalicha Paruppu - South Indian Thanjavur Moong Dal Fry
 
Prep time
Cook time
Total time
 
South Indian Restaurant style Moong Dal Fry. Recipe for Tamilnadu Thanjavur Thalicha Paruppu.
Author:
Recipe type: Side Dishes, Lentils, Dal
Cuisine: South Indian, Tamilnadu
Serves: 3
Ingredients
For Cooking Dal
  • ½ cup Split Moong Dal
  • 2 Cups Water
First Tempering
  • 2 teaspoon Sesame Oil
  • 1 teaspoon cumin
  • 4 cloves garlic
  • 10 shallots (small onions), sliced
  • 1 Tomato, finely chopped
  • 1 teaspoon salt
  • 1 cup water
  • 2-3 sprigs coriander leaves, chopped
For second Tempering
  • 2 teaspoon Ghee
  • ½ teaspoon Cumin seeds
  • 2 sprigs Curry leaves
  • 2 dried Red chillies
  • ⅛ teaspoon Asafoetida (hing)
  • ¼ teaspoon Turmeric Powder
  • ½ teaspoon Red chilli powder
Instructions
For Cooking Dal
  1. Boil half a cup of split moong dal with 2 cups of water in a pressure cooker for 4 whistles. Switch off the flame and allow the pressure to release naturally. Set aside.
First Tempering
  1. Heat sesame oil in a pan and add in the cumin seeds. Let it splutter. Then add in the chopped shallots (small onions) and the garlic. Pound the garlic with the skin 2-3 times and add it whole to the pan. It gives a nice aroma. Let it cook for a couple of minutes.
  2. Now add in the finely chopped tomatoes, one cup of water and a teaspoon of salt. Let it cook for 5 minutes in medium flame until the tomatoes are nicely cooked and mashed up.Now add the cooked dal and half a cup of water. If the consistency of the dal is too thick, add a little more water. The dal should not be too thick like mashed potato. We are looking at a pouring consistency. Let the dal come to a boil. Add in the coriander leaves and switch off the flame.
For second Tempering
  1. Heat two teaspoon of ghee in a small kadai and add in the cumin seeds, curry leaves and the dried red chillies. Let it splutter. Once the spluttering sound has subsided, switch off the flame and add in the turmeric powder, asafoetida (hing) and red chilli powder. Mix well to roast the powders. Add it to the dal and serve hot with rice.

The post Dal Fry – Thanjavur Thalicha Paruppu – South Indian Moong Dal Fry appeared first on Kannamma Cooks.

Milagai Mandi from Karaikudi Bangala Hotel – Chettinad Green Chilli Curry

$
0
0

chettinad-milagai-mandi-1

The capital of Chettinad, Karaikudi sends you to another world with its amazing architectural legacy of palatial houses, food and the people. Chettinad is also famous for the labour intensive Handloom cotton sarees known as “kandaangi” with its “gopura-karai” – temple-tower motif. One of the other gems that can be found here is the Athangudi tiles, named after the place of the manufacture. Athangudi tiles are hand-made.

Chef Karuppaiah and Rakesh Raghunathan

This recipe for milagai mandi comes from The Bangala in Karaikudi. I first saw Chef Karuppaiah in an amazing show sutralam suvaikalam run by Rakesh Raghunathan of Puliogare Travels. Mr. Karupaiah is the most cutest, wittiest and the true master chef ever. He has been the Chef at The Bangala for close to about 50 years.

Bangala-hotel-karaikudi-Gate

Earlier known as “Senjai Bangala”, the property was established in 1910. It was a club for the chettiar men and the VIP visitors. It is said that the Governor of Madras, Sir Athur Hope, visited in the 1940’s. All the furniture, cutlery and crockery used from those times are still in use. In 1998, the Bangala was restored and converted into a heritage stay/resort. The place has all the old world charm.

Bangala-hotel-karaikudi-portico

The food at The Bangala is awesome. It does not get more authentic Chettinad than this.

Bangala-hotel-karaikudi-food

The folks behind the Bangala have even published a cookbook called The Bangala Table and it is entirely on the food of Chettinad. Its authentic, elaborately written and a must have if you love chettinad food. The recipes are awesome with photographs.  The Bangala Table: Flavors and Recipes from Chettinad
Here is Milagai Mandi from Chef Karuppaiah of The Bangala.
We need mandi for making this recipe. So what is Mandi?
Mandi in tamil means sediment. In cooking, mandi refers to arisi mandi or rice mandi. Its nothing but the left over water from washing rice. When we cook rice for lunch, just soak the rice in water for 5 minutes. After 5 minutes mix (rub) the rice and water well with your hands and drain. The starchy drained water is mandi. So what is the short cut for making mandi? If you are in a hurry, just mix 2 teaspoon of rice flour in 1.5 cups of water and mix well. Thats instant mandi for you.
We will need about 1.5 cups of mandi for this recipe. Discard the rest or store in the refrigerator for future use.

Soak a big lime size tamarind in 2 cups of mandi for 20 minutes. Once the tamarind has been soaked, squeeze it between the fingers to release all the juices. Strain the juice and set aside.

chettinad-milagai-mandi-water

We need de-skinned tomatoes for this recipe. Boil water in a kettle to a roaring boil. Make a cross on the tomato like the picture below (It makes it for easy peeling later) and drop the tomatoes in hot water. Let it cook for 3 minutes. Switch off the flame. Drain the water and peel the tomatoes. Blend the tomatoes in a mixie / blender to a coarse paste. Set aside.

chettinad-milagai-mandi-tomatoes

We will need the main ingredients Garlic, Shallots (small onions) and GREEN CHILLIES!!!!!!!!!! Lots of green chillies! Get them ready.

chettinad-milagai-mandi-ingredients

Heat sesame oil in a pan and add in the mustard seeds and the urad dal. Let it splutter. Then add in the garlic, shallots and green chillies and saute well until all the ingredients are roasted. About 3-4 minutes. The green chillies might splutter as they are added whole. So word of caution!

chettinad-milagai-mandi-fry

Add in the tomato paste. Fry till the tomatoes are cooked and almost dry. Add in the salt and the tamarind mandi water.

chettinad-milagai-mandi-cook

Cook on high flame for 10 minutes. The gravy will thicken up. At the end of 10 minutes, the gravy should be soupy. If its watery, mix two teaspoon of rice flour in 1/4 cup of water and add it to the gravy. Allow it to cook for couple of minutes until the gravy becomes thick.

chettinad-milagai-mandi-soupy

Serve hot with rice. Chef Karuppaiah says that this dish is traditionally eaten in Chettinad with rice only.

Chettinad Milaga Mandi Indian Style Green Chilli Gravy #curry #spicy #chettinad #authentic #recipe #bangala

Milagai Mandi from Karaikudi Bangala Karupaiah - Chettinad Green Chilli Curry
 
Prep time
Cook time
Total time
 
Chettinad Pachai milagai mandi recipe by Chef Karuppaiah of the heritage property - The Bangala. Its a spicy sauce simmered in a tamarind gravy.
Author:
Recipe type: Side Dish, Lunch
Cuisine: Tamilnadu
Serves: 3
Ingredients
For Tamarind Extract
  • 1.5 cups Rice Mandi (see notes)
  • 1 lime size tamarind
Other Prep Work
  • 2 tomatoes de-skinned and ground to a paste
For Gravy
  • 4 tablespoon sesame (gingely) oil
  • ½ teaspoon mustard seeds
  • ½ teaspoon urad dal
  • 20 cloves garlic
  • 20 cloves shallots (small onions)
  • 20 green chillies
  • 1 teaspoon coarse salt
For Thickening Gravy (Optional)
  • 2 teaspoon rice flour
  • ¼ cup water
Instructions
  1. Soak a big lime size tamarind in 2 cups of mandi for 20 minutes. Once the tamarind has been soaked, squeeze it between the fingers to release all the juices. Strain the juice and set aside.
  2. Boil water in a kettle to a roaring boil. Make a cross on the tomato and cook for 3 minutes. Switch off the flame. Drain the water and peel the tomatoes. Blend the tomatoes in a mixie / blender to a coarse paste. Set aside.
  3. Heat sesame oil in a pan and add in the mustard seeds and the urad dal. Let it splutter. Then add in the garlic, shallots and green chillies and saute well until all the ingredients are roasted. About 3-4 minutes.
  4. Add in the tomato paste. Fry till the tomatoes are cooked and almost dry. Add in the salt and the tamarind mandi water.
  5. Cook on high flame for 10 minutes. The gravy will thicken up. At the end of 10 minutes, the gravy should be soupy. If its watery, mix two teaspoon of rice flour in ¼ cup of water and add it to the gravy. Allow it to cook for couple of minutes until the gravy becomes thick.
  6. Serve hot with rice.
Notes
What is Mandi?
Mandi in tamil means sediment. In cooking, mandi refers to arisi mandi or rice mandi. Its nothing but the left over water from washing rice. When we cook rice for lunch, just soak the rice in water for 5 minutes. After 5 minutes mix (rub) the rice and water well with your hands and drain. The starchy drained water is mandi. So what is the short cut for making mandi? If you are in a hurry, just mix 2 teaspoon of rice flour in 1.5 cups of water and mix well. Thats instant mandi for you.
We will need about 1.5 cups of mandi for this recipe. Discard the rest or store in the refrigerator for future use.

The post Milagai Mandi from Karaikudi Bangala Hotel – Chettinad Green Chilli Curry appeared first on Kannamma Cooks.

Egg Salad Sandwich

$
0
0

Egg Salad Sandwich made with Eggs, cucumber and Mayo #sandwich #egg #salad #quickbite

This egg salad sandwich recipe is so easy to make that its perfect for that quick bite in the morning or for the school lunch box. You just need to have boiled eggs ready and the whole sandwich can be put together in less than 15 minutes. Egg Mayo Sandwich is a staple at all the Bistros and its so easy to make at home too. It looks daunting but the ingredients are so simple that its perfect for busy mornings. Here is my version.

Clean, Peel and finely chop a cucumber. Add it to a bowl. Add in two heaped tablespoon of store bought Mayonnaise. Add in the finely chopped coriander leaves (cilantro), salt, pepper and finely chopped green chilli. Green chilli is optional. I like the heat of the chilli.

Egg-salad-sandwich-recipe-chop

Chop two boiled eggs and add it to the bowl. Here is how to make perfect boiled eggs every single time. Mix well to combine. Check for seasoning. The egg salad is ready. Set aside.

Egg-salad-sandwich-recipe-mix-well

Remove the crusts of the bread slices. This is a very soft ooey gooey sandwich. So the crust got to go. Spread the egg salad evenly on the bread slices. About two tablespoons per sandwich. Cover the salad with another slice of bread and apply a little ghee (clarified butter) on top. One can use butter too.

Egg-salad-sandwich-recipe-spread

Heat a griddle on low flame for 2 minutes. The key to even browning of a good sandwich is to toast the sandwich on a low flame. Toast the sandwich on both sides until golden. Remove off heat and serve hot or at room temperature.

Egg-salad-sandwich-recipe-toast

Welcome to the clean plates club!

Egg-salad-sandwich-recipe-finish-off

Egg Salad Sandwich
 
Prep time
Cook time
Total time
 
Easy Egg Salad Sandwich recipe made with cucumbers, egg, cilantro and mayo. Excellent for a quick bite or a school lunch box.
Author:
Recipe type: Brunch, Sandwich
Cuisine: American
Serves: 4
Ingredients
For the egg salad
  • 2 Boiled Eggs
  • 1 Cucumber
  • 3-4 sprigs Coriander leaves (cilantro)
  • 1 green chilli
  • 2 heaped tablespoon Mayonnaise
  • Salt and pepper to taste
For the Sandwich
  • 1 tablespoon Ghee (clarified butter)
  • 8 Slices Sandwich Bread
Instructions
  1. Clean, Peel and finely chop a cucumber. Add it to a bowl. Add in finely chopped coriander leaves (cilantro), salt, pepper and finely chopped green chilli. Add in two heaped tablespoon of Mayonnaise.
  2. Chop two boiled eggs and add it to the bowl. Mix well to combine. Check for seasoning. Set aside.
  3. Remove the crusts of the bread slices. Spread the egg salad evenly on the bread slice. About two tablespoons per sandwich. Cover the salad with another slice of bread and apply a little ghee (clarified butter) on top.
  4. Heat a griddle on low flame for 2 minutes. Toast the sandwich on both sides until golden. Remove off heat and serve hot or at room temperature.

The post Egg Salad Sandwich appeared first on Kannamma Cooks.

Keerai Mandi Recipe Chettinad Style – Spinach Curry in Sauce

$
0
0

South Indian Style Spinach in Coconut Sauce Keerai Mandi #spinach #curry #sauce #coconut #recipes #tamilnadu #chettinad #karaikudi

The Chettinad women folks are said to be very thrift and use even the inexpensive ingredients wisely. The usage of mandi (rice water while washing rice) is a gem. They are said to never waste anything however inexpensive they may be. Not just in cooking. Life in general. The olden day Chettiar community was a very affluent community and traded all over the world. This is a picture of an old Cigarette box and a biscuit box from the 1950’s that I found on the attic in Karaikudi on my recent trip. They have put even these simple things to use in their everyday life for decades. These are not to be confused with hoarding.

Chettinad-Keerai-Mandi-Recipe-1

This recipe is an everyday spinach curry – Keerai Mandi served with rice during lunch. Keerai Mandi is a mainstay in Chettinad cuisine of Tamilnadu. Its called as Keerai (Spinach) Mandi for a reason.  So what is Mandi? Mandi in tamil means sediment. In cooking, mandi refers to arisi mandi or rice mandi. Its nothing but the left over water from washing rice. When we cook rice for lunch, just soak the rice in water for 5 minutes. After 5 minutes mix (rub) the rice and water well with your hands and drain. The starchy drained water is mandi. So what is the short cut for making mandi? If you are in a hurry, just mix 2 teaspoon of rice flour in 1 cup of water and mix well. Thats instant mandi for you. We will need about 1 cup of mandi for this recipe.

Here is the recipe for Keerai Mandi. Chop the shallots (small onions), garlic and green chillies. Set aside. Heat oil in a pan and when the oil is hot, add in the mustard seeds and the urad dal. Wait for the mustard seeds to splutter and the urad dal to brown. Tempering is key for the taste of the final dish. So have patience until the mustard seeds splutter and the urad dal browns.

Chettinad-Keerai-Mandi-Recipe-Tempering

Add in the green chillies, garlic and the shallots (small onions).  Fry till the onions are soft.

Chettinad-Keerai-Mandi-Recipe-fry-onions

When the shallots are frying, clean, wash and roughly chop the spinach. You can use any kind of spinach leaves for this recipe. Add in the spinach to the pan.

Chettinad-Keerai-Mandi-Recipe-Wash-Spinach

Add in the rice mandi and the salt. Let the mixture boil in medium flame for 10 minutes.

Chettinad-Keerai-Mandi-Recipe-Add-Mandi

When the mixture is simmering, lets grind some coconut paste. Grind 1/3  cup of coconuts with one cup of water to a very smooth paste. Strain on a sieve. We got coconut milk and to this, add a heaping teaspoon of rice flour. Mix well to combine.

Chettinad-Keerai-Mandi-Recipe-coconut-milk

When the spinach mixture is thick and saucy , Add in the coconut milk mixture to the pan. Simmer for a minute. Switch off the flame and remove off heat. Serve hot with rice.

Chettinad-Keerai-Mandi-Recipe-Bring-to-a-boil

Keerai Mandi
 
Prep time
Cook time
Total time
 
How to make Chettinad Keerai Mandi Recipe. karaikudi special. Spinach Curry Tamilnadu style. A very traditional easy to do dish. With step by step pictures.
Author:
Recipe type: Side Dish
Cuisine: Tamilnadu, South Indian
Serves: 3
Ingredients
For the Tempering and Gravy
  • 1 cup Rice Mandi (see notes)
  • 2 teaspoon sesame oil (gingely oil)
  • ½ teaspoon mustard seeds
  • ½ teaspoon urad dal
  • 15 shallots , finely sliced (small onions)
  • 2 green chillies, chopped
  • 6 cloves garlic, chopped
  • 2 small bunches Spinach leaves ( About 200 grams)
  • 1 teaspoon salt
For Coconut mixture
  • ⅓ cup coconut
  • 1 cup water
  • 1 heaping teaspoon Rice flour
Instructions
  1. Heat oil in a pan and when the oil is hot, add in the mustard seeds and the urad dal. Wait for the seeds to splutter and the urad dal to brown.
  2. Add in the green chillies, garlic and the shallots (small onions). Fry till the onions are soft.
  3. When the shallots are frying, clean, wash and roughly chop the spinach.
  4. Add in the spinach, rice mandi, and the salt. Let the mixture boil in medium flame for 10 minutes.
  5. Grind ⅓ cup of coconuts with one cup of water to a very smooth paste. Strain on a sieve. This is coconut milk and to this, add a heaping teaspoon of rice flour. Mix well to combine.
  6. When the spinach mixture is thick and saucy , Add in the coconut milk mixture to the pan. Simmer for a minute. Switch off the flame and remove off heat. Serve hot with rice.
Notes
What is Mandi? Mandi in tamil means sediment. In cooking, mandi refers to arisi mandi or rice mandi. Its nothing but the left over water from washing rice. When we cook rice for lunch, just soak the rice in water for 5 minutes. After 5 minutes mix (rub) the rice and water well with your hands and drain. The starchy drained water is mandi. So what is the short cut for making mandi? If you are in a hurry, just mix 2 teaspoon of rice flour in 1 cup of water and mix well. Thats instant mandi for you. We will need about 1 cup of mandi for this recipe.

The post Keerai Mandi Recipe Chettinad Style – Spinach Curry in Sauce appeared first on Kannamma Cooks.

Mothagam – Sweet Coconut Kozhukattai for Vinayagar Chathurthi

$
0
0

Sweet dumplings called as mothagam kozukattai. Prasadam food for ganesh chaturthi. #sweet #dumpling

Vinayagar Chathurthi means Kozhukattai. Kozhukattai is the main prasadam for the day. This is a very easy recipe for Sweet Kozhukattai that is made using soaked rice. Here is how to do Sweet Coconut Kozhukattai for Vinayagar Chathurthi.

Wash 1/2 cup of raw rice in water for 2-3 times. Soak the washed rice in 1/2 cup of water. Let it soak for a minimum of one hour. Grind the rice in the mixie along with the water used for soaking rice. Do not use extra water. You should grind it to a very smooth paste. Set aside.

mothagam-sweet-kozukattai-ganesh-chaturthi-grind

Heat the remaining half a cup of water in a pan until boiling. Add in the oil and the salt. Add in the rice paste and mix well continously until it forms a very thick paste. Remove off heat. cover with a pan and set aside.

mothagam-sweet-kozukattai-ganesh-chaturthi-dumpling-dough

Now lets make the stuffing AKA pooranam.

Heat ghee in a pan and add in the broken cashew-nuts. Fry until golden. Add in the freshly shredded coconut, powdered jaggery and cardamom. Fry till all the jaggery is melted.

Grind two teaspoon of fried gram dal (pottu kadalai) to a smooth powder. Add in the fried gram powder to the pan and mix well. Switch off the flame. Allow it to cool. The stuffing will thicken up as it cools.

mothagam-sweet-kozukattai-ganesh-chaturthi-pooranam

Now lets make the dumpling. One can make the dumpling by hand or with the help of the mold. I will show both methods.  Apply little oil in your hands and spread a small dough on the palm. add in a little stuffing and make a dumpling like below by folding the dough on itself. Set aside.

mothagam-sweet-kozukattai-ganesh-chaturthi-by-hand

The dumpling made with mold looks beautiful. Here is where you can buy them.

Click here to buy Modak / Kozhukattai molds

Apply oil in your hands and take a small piece of the dough and fill only the sides of the cavity. If the dough is extremely sticky, dip your hands in water and then fill.

mothagam-sweet-kozukattai-ganesh-chaturthi-oil-hands

After filling the dough, place a little stuffing inside till the top. Cover the mold with some more dough and carefully remove the dumpling from the cavity. Set aside. Repeat until the all the dough is finished.

mothagam-sweet-kozukattai-ganesh-chaturthi-fill

Heat an idli vessel with water and steam the dumplings for 7-8 minutes. Remove off heat and serve sweet kozhukattai warm or at room temperature.

mothagam-sweet-kozukattai-ganesh-chaturthi-steammothagam-sweet-kozukattai

Mothagam - Sweet Coconut Kozhukattai for Vinayagar Chathurthi
 
Prep time
Cook time
Total time
 
Recipe for Mothagam - Sweet Coconut Kozhukattai with home made ground rice. Vinayagar Chathurthi festival prasadam. Easy to do recipe with coconut pooranam.
Author:
Recipe type: Prasadam, Sweet, Dessert
Cuisine: Tamilnadu, South Indian
Serves: 15
Ingredients
For the Dumpling
  • ½ cup Raw Rice
  • 1 cup Water (1/2 cup + ½ cup)
  • ¼ teaspoon Salt
  • ¼ teaspoon Oil
For the Stuffing (pooranam)
  • ½ cup fresh shredded Coconut
  • ½ cup powdered Jaggery
  • ½ teaspoon Cardamom powder
  • a pinch of salt
  • 2 teaspoon ghee
  • 5 cashewnuts, broken into small pieces
  • 2 teaspoon fried gram dal (pottu kadalai in tamil)
Instructions
For the Dumpling
  1. Wash ½ cup of raw rice in water for 2-3 times. Soak the washed rice in ½ cup of water. Let it soak for a minimum of one hour. Grind the rice in the mixie along with the water used for soaking rice. Do not use extra water. You should grind it to a very smooth paste. Set aside.
  2. Heat the remaining half a cup of water in a pan until boiling. Add in the oil and the salt. Add in the rice paste and mix well continously until it forms a very thick paste. Remove off heat. cover with a pan and set aside.
Now lets make the stuffing AKA pooranam.
  1. Heat ghee in a pan and add in the broken cashew-nuts. Fry until golden. Add in the freshly shredded coconut, powdered jaggery and cardamom. Fry till all the jaggery is melted.
  2. Grind two teaspoon of fried gram dal (pottu kadalai) to a smooth powder. Add in the fried gram powder to the pan and mix well. Switch off the flame. Allow it to cool. The stuffing will thicken up as it cools.
  3. Now lets make the dumpling. One can make the dumpling by hand or with the help of the mold.
  4. * Look at visual instructions above.
  5. Heat an idli vessel with water and steam the dumplings for 7-8 minutes. Remove off heat and serve warm or at room temperature.

The post Mothagam – Sweet Coconut Kozhukattai for Vinayagar Chathurthi appeared first on Kannamma Cooks.

Avarakkai Poriyal with Coconut – Broad Bean Stir-fry

$
0
0

Broad bean stir-fry - Avarakkai Poriyal #vegan #glutenfree #indian #lunch #stirfry #healthy #recipe #vegetable

Avarakkai – அவரைக்காய் , Broad beans is called  as “Naatu kai” or country vegetable. It has a very high fiber content and a very earthy taste. This is an everyday simple vegetable stir-fry dish served usually for lunch.

The first thing in making the stir-fry is to soak the avarakkai in lots of water for 10 minutes to get rid of the fine dirt. Wash the bean and set aside. Now we need to de-string the beans. This is an important step as the strings are very fibrous and not pleasant to eat. Snap off the tip of one end of the bean with a paring knife and pull the string like below. Snap and pull other end of the bean too. Discard the snapped-off ends and strings. Note that the tender young bean might not have strings. So just snap off the ends alone.

avarakkai-poriyal-recipe-remove-strings

Chop the Avarakkai. Add the vegetable directly in a pressure cooker. Add in 1/3 cup of water, 1 teaspoon red chilli powder and 1/2 teaspoon turmeric powder. Pressure cook in medium flame for 3 whistles. If the Avarakkai is tender, then 2 whistles are enough. Switch off the flame. Set aside and wait for the pressure inside the cooker to release naturally.

avarakkai-poriyal-recipe-chop-cook

Now lets do the tempering. Add in oil to the pan and when the oil is hot, add in mustard seeds, urad dal, curry leaves and dried red chillies. Wait for the mustard seeds to crackle and the urad dal to brown. Add in the chopped onions and the salt. Fry till the onions are soft and translucent. Add in the boiled vegetables and freshly shredded coconut. Fry for a minute.

avarakkai-poriyal-recipe-coconut

Switch off the flame and remove from heat. Serve hot with rice and dal for lunch.

Avarakkai Poriyal with Coconut - Broad Bean Stir-fry
 
Prep time
Cook time
Total time
 
Easy South Indian style recipe for Avarakkai Poriyal made with coconut. Broad bean stir fry for lunch. Popular in Tamilnadu and Kerala.
Author:
Recipe type: Side Dish, Stir-fry
Cuisine: South Indian, Tamilnadu
Serves: 4
Ingredients
For Boiling Vegetable
  • 500 grams Avarakkai - Broad Bean
  • ⅓ cup Water
  • ½ teaspoon Turmeric
  • 1 teaspoon Red Chilli Powder
For Tempering
  • 2 teaspoon Peanut Oil
  • 2 Red Chillies, dried
  • ½ teaspoon black mustard seeds
  • ½ teaspoon urad dal
  • 2 sprigs Curry Leaves
  • 1 onion, finely chopped
  • 1 teaspoon salt
  • ⅓ cup freshly shredded coconut
Instructions
  1. Wash the bean and set aside. Snap off the tip of one end of the bean with a paring knife and pull the string like below. Snap and pull other end of the bean too. Discard the snapped-off ends and any fibers.
  2. Chop the Avarakkai. Add the vegetable directly in a pressure cooker. Add in ⅓ cup of water, 1 teaspoon red chilli powder and ½ teaspoon turmeric powder. Pressure cook in medium flame for 2-3 whistles. Set aside and wait for the pressure inside the cooker to release naturally.
  3. Add in oil to the pan and when the oil is hot, add in mustard seeds, urad dal, curry leaves and dried red chillies. Wait for the mustard seeds to crackle and the urad dal to brown. Add in the chopped onions and the salt. Fry till the onions are soft and translucent. Add in the boiled vegetables and freshly shredded coconut. Fry for a minute. Switch off the flame and remove from heat.
  4. Serve hot with rice and dal for lunch.

The post Avarakkai Poriyal with Coconut – Broad Bean Stir-fry appeared first on Kannamma Cooks.


Agathi Keerai Poriyal Recipe

$
0
0

Agathi-Keerai-poriyal-Tamilnadu-style-leaves

Agathi Keerai is a highly regarded green in Tamil cuisine as it has lots of health benefits. There are two theories as to why its called as Agathi. It is believed to be named after the Sage Agathiyar / Agasthya. Sage Agasthya is often considered as the father of traditional Indian Medicine. Agathiyar(அகத்தியர்) in Tamil means one who is focused inward. Agam in tamil means inner place.
The other theory is that the name can be split in Tamil as Agam + thee = agathi. Agam means inner place. “Thee” means fire. So agathi is considered to be a substance that keeps the heat of the body in balance. These leaves are used extensively for its healing properties. It is called as Agathi keerai அகத்தி கீரை in Tamil, Avisi Koora in Telugu, Agase Soppu in Kannada and gaach-munga in Hindi. The leaves are slightly bitter but tastes really well with the added coconut.

Agathi-Keerai-poriyal-Tamilnadu-style

There are many agathi keerai recipes. Here is how to do a simple Tamilnadu style agathi keerai poriyal – stir fry recipe. First, remove the leaves from the stem of the keerai. Just pull the leaves from the stem downward like below and it will easily come off. Discard the stem.

Agathi-Keerai-poriyal-Tamilnadu-style-clean agathi

Soak the leaves in plenty of water for 10 minutes to get rid of the fine dust and sand. Wash it several times in running water. Drain the water and set aside.

Agathi-Keerai-poriyal-Tamilnadu-style-wash agathi

Heat oil in a pan until hot. Add in the mustard seeds and the urad dal. Wait for the mustard seeds to splutter and the urad dal to brown. Add in the finely chopped onions, salt and the chopped green chillies. Fry till the onions are soft.

Agathi-Keerai-poriyal-Tamilnadu-style-fry-onion

Add in the agathi leaves and cook for 10 minutes in medium flame until the leaves are soft and cooked. Add a little water (about 1/4 cup ) while cooking if necessary.

Agathi-Keerai-poriyal-Tamilnadu-style-cook-spinach

Add in the fresh shredded coconut and fry for a minute. Switch off the flame.

Agathi-Keerai-poriyal-Tamilnadu-style-coconut

Serve Agathi keerai for lunch with rice, sambar and rasam.

Agathi-Keerai-poriyal-with-coconut

Agathi Keerai Poriyal Recipe
 
Prep time
Cook time
Total time
 
Agathi Keerai அகத்தி கீரை Poriyal with coconut. Easy and healthy to do side dish for lunch. South Indian Tamilnadu style recipe.
Author:
Recipe type: Side dish for Lunch
Cuisine: South Indian, Tamilnadu
Serves: 4
Ingredients
  • 250 grams Agathi Keerai
  • 2 teaspoon peanut oil
  • ½ teaspoon mustard seeds
  • ½ teaspoon split urad dal
  • 1 onion, finely chopped
  • 3 green chillies, chopped
  • 1 teaspoon salt
  • ½ cup fresh shredded coconut
Instructions
  1. First, remove the leaves from the stem of the keerai. Discard the stem. Soak the leaves in plenty of water for 10 minutes to get rid of fine dust and sand. Wash it several times in running water. Drain the water and set aside.
  2. Heat oil in a pan until hot. Add in the mustard seeds and the urad dal. Wait for the mustard seeds to splutter and the urad dal to brown. Add in the finely chopped onions, salt and the chopped green chillies. Fry till the onions are soft.
  3. Add in the agathi leaves and cook for 10 minutes in medium flame until the leaves are soft and cooked. Add a little water (about ¼ cup ) while cooking if necessary.
  4. Add in the fresh shredded coconut and fry for a minute. Switch off the flame.
  5. Serve Agathi keerai for lunch with rice and a side dish of sambar and rasam.

The post Agathi Keerai Poriyal Recipe appeared first on Kannamma Cooks.

Set Dosa

$
0
0

Home made set dosa batter recipe #karnataka #udipi #fermented #vegan #glutenfree #homemade #overnite #batter #mangalore #dosa #soft #spongy #yummy

The thing I like about set dosa is that its really so soft and so good for dunking in chutney or kurma / sagu. Its common in restaurants here in Bangalore and the name set dosa kind of intrigued me. At first, I just thought it was a set of uthappam served with kurma. But everytime I ate it, I dint know how they could get the dosa so soft and spongy. Later on, I learnt that the batter itself is completely different. The softness of the batter comes from the atukulu or poha (Aval). Also the addition of yogurt makes the batter so soft and so delicious. Its usually served with vegetable sagu / kurma. This is a very famous dish from the udipi region of karnataka. Here is my way of doing it.

We will need a cup of idly rice (I used salem car rice). Use idly rice only. Raw rice does not work very well for this recipe. Idly rice is easily available in grocery shops these days. We will need quarter cup of unpolished whole white urad dal, half a cup of poha (aval/atukulu) and half a teaspoon of fenugreek seeds. To know in detail about the ingredients that we usually use for making idli dosa batter, Check out my post on how to make soft idlis.

Wash all the ingredients together 2-3 times in running water to get rid of dust and dirt. Soak the ingredients in a bowl with lots of water for 2 hours. Drain the water and set aside.

set-dosa-batter-recipe-soak-rice

Grind the ingredients to a smooth paste. While grinding add half a cup of yogurt and a cup of water. The batter needs to be ground to a really fine smooth paste. If the mixie wont budge, grind the batter in 2-3 batches.

set-dosa-batter-recipe-grind

Once the batter is ready, cover the batter bowl with a lid and let it to ferment in a warm draft free place for 12 hours. If the place where you live is cold, leave it inside the oven with the pilot light on. After the fermentation, Set Dosa batter should have increased in volume and should look foamy. Mix in the salt. The batter is ready. We are ready to do dosas.

set-dosa-batter-recipe-fermented

Heat a dosa griddle/pan until medium hot. Apply few drops of oil on the griddle. Ladle the batter and pour it onto the griddle. Do not spread the batter like you do normal dosa. Spread it ever so lightly if necessary. Lots of holes will start forming on the top of the dosa. Cover the griddle with a lid and let it cook for 40 seconds on low medium flame. This dosa is usually cooked only on one side.

set-dosa-batter-recipe-steam

The dosas are ready when the top is completely cooked and the bubbles have settled.

set-dosa-batter-recipe-holes

Remove the dosa from the griddle and repeat with the rest of the batter. Serve the dosa hot with vegetable sagu / kurma or a spicy kaara chutney.

set-dosa-batter-recipe

Set Dosa
 
Prep time
Cook time
Total time
 
Recipe for spongy white set dosa recipe. Made with rice and atukulu / poha. Makes for an excellent breakfast.
Author:
Recipe type: Breakfast, dosa
Cuisine: South Indian
Serves: makes 15 dosas
Ingredients
  • Measurements used - 1 cup = 250ml
For grinding batter
  • 1 cup idly rice
  • ¼ cup unpolished whole white urad dal
  • ½ cup poha (aval / atukulu)
  • ½ teaspoon fenugreek seeds
  • ½ cup curd
  • 1 cup water
Other ingredients
  • 1 teaspoon salt
  • Oil for griddle while making dosa
Instructions
  1. Wash all the ingredients together 2-3 times in running water to get rid of dust and dirt. Soak the ingredients in a bowl with lots of water for 2 hours. Drain the water and set aside.
  2. Grind the ingredients to a smooth paste. While grinding add half a cup of yogurt and a cup of water. The batter needs to be ground to a really fine smooth paste. If the mixie wont budge, grind the batter in 2-3 batches.
  3. Once the batter is ready, cover the batter bowl with a lid and let it to ferment in a warm draft free place for 12 hours. If the place where you live is cold, leave it inside the oven with the pilot light on. After the fermentation, Set Dosa batter should have increased in volume and should look foamy. Mix in the salt. The batter is ready.
  4. Heat a dosa griddle/pan until medium hot. Apply few drops of oil on the griddle. Ladle the batter and pour it onto the griddle. Cover the griddle with a lid and let it cook for 40 seconds on low medium flame.
  5. Remove the dosa from the griddle and repeat with the rest of the batter. Serve the dosa hot with vegetable sagu / kurma or a spicy kaara chutney.
Notes
Store the left over batter in the refrigerator and use within 2 days.

The post Set Dosa appeared first on Kannamma Cooks.

Amit’s Aloo Poha – Batata Poha Recipe – Aval Upma

$
0
0

Poha with potatoes and peanuts. Traditional breakfast dish. #poha #breakfast #glutenfree #vegan #potatoes

I have a very fond memory of this dish. Me and my friend Amit Chandak worked together for some time a decade ago. I was in Chennai at that time and my office was in Sholinganallur. The cab would pick me up at six in the morning. So that meant I had to get up at 5 everyday. I am not a morning person at all. I can never be one. Everyday when it was time for breakfast, Amit would offer his breakfast dabba / box to taste for everyone. Whatever he brought, he shared. Even if it was bread. His heavily broken Tamil is something I really enjoyed listening to. This poha was a genius from his lunch box. I fell in love with this dish. Years have passed but the memories of those days still stays so fresh. Here is Amit’s Aloo Poha recipe. This makes for an excellent breakfast. My family likes it so much, I even make it as a snack in the evening.

potato-poha-for-breakfast-Amit-Chandak

We will be using thick poha for this recipe. Poha is called as Aval in Tamil. Do not use the thin variety. The thin variety becomes into mush and does not work well in this recipe. Gently wash the poha in water and soak it for 3-4 minutes. Drain the water and set aside. Do not try and squeeze the excess moisture from the poha. Just drain and set aside.

potato-poha-for-breakfast-soak-poha

Heat oil in a pan and add in the cumin seeds and the mustard seeds. Wait for the mustard seeds to splutter. Add in the peanuts and fry for a minute. Add in the green chillies, chopped onions and fry till the onions are soft. Once the onions are soft, add in the diced potatoes. We would need peeled and diced potatoes for this recipe. Add in half of the salt and cover the pan with a lid and let it cook for 6-7 minutes on medium flame.

potato-poha-for-breakfast-cook-potato

Once the potatoes are fork tender, add in the red chilli powder and the turmeric powder. Saute to combine.

potato-poha-for-breakfast-add-spices

Add in the poha and the remaining salt. Add a teaspoon of sugar. Mix well. Squeeze the lime juice.

potato-poha-for-breakfast-add-salt

Mix everything well to combine. Set the flame to low and cover the pan with a lid and let the poha cook for 5 minutes. Once the poha is heated up and cooked, add in the coriander leaves (cilantro) and switch off the flame.

potato-poha-for-breakfast-garnish

Serve the poha hot with a cup of coffee.

potato-poha

Aloo Poha
 
Prep time
Cook time
Total time
 
Recipe for aloo poha or batata poha as its called. Makes for an amazing and easy breakfast. Made with thick poha, peanuts and potatoes.
Author:
Recipe type: Breakfast
Cuisine: North Indian
Serves: 3
Ingredients
  • 1 Cup thick Poha / Aval (250 ml)
  • 3 tablespoon Vegetable oil
  • ½ tsp mustard seeds
  • ½ tsp jeera
  • 2 green chillies, chopped
  • 3 tablespoon peanuts
  • 1 Onion, chopped
  • 2 medium sized potatoes, diced
  • 1 tsp Turmeric powder
  • 1 tsp Red Chilli powder
  • 1 teaspoon salt
  • 1 teaspoon Sugar
  • juice from half a lime
  • 2 sprigs coriander leaves (cilantro)
Instructions
  1. Gently wash the poha in water and soak it for 3-4 minutes. Drain the water and set aside.
  2. Heat oil in a pan and add in the cumin seeds and the mustard seeds. Wait for the mustard seeds to splutter. Add in the peanuts and fry for a minute. Add in the green chillies, chopped onions and fry till the onions are soft. Once the onions are soft, add in the diced potatoes. We would need peeled and diced potatoes for this recipe. Add in half of the salt and cover the pan with a lid and let it cook for 6-7 minutes on medium flame.
  3. Once the potatoes are fork tender, add in the red chilli powder and the turmeric powder. Saute to combine.
  4. Add in the poha and the remaining salt. Add a teaspoon of sugar. Mix well. Squeeze the lime juice.
  5. Mix everything well to combine. Set the flame to low and cover the pan with a lid and let the poha cook for 5 minutes. Once the poha is heated up and cooked, add in the coriander leaves (cilantro) and switch off the flame.
  6. Serve the poha hot with a cup of coffee.

The post Amit’s Aloo Poha – Batata Poha Recipe – Aval Upma appeared first on Kannamma Cooks.

Rava Laddu Recipe

$
0
0

South Indian Rava Laddu - Semolina Laddu #dessert #easy #tamil

Rava Laddu ரவா லட்டு is my aunt Sarasu athamas trademark sweet. The 80’s and 90’s in my opinion were the best. When I was a kid and when all cousins got together in my aunts house, the fun was unlimited. We all would sit near the telephone ( the big black rotary telephone ) and dial some random number seeing the yellow telephone directory. When someone picks at the other end, we would all giggle and cut the call. Oh what thrill! The joy of rotating the number wheel and the sound can never be forgotten. My aunt would make this Rava laddu and keep it in a big stainless steel dabba lined with a newspaper on the dining table. This laddu brings back sweet memories. This is the most simplest and the easiest recipe ever. This recipe is made without milk. Its made with sooji and coconut. Its a South Indian Tamilnadu style recipe.

We will need fine sooji rava also called as chiroti rava for this recipe. Powder a cup of sugar in a blender/mixie to a powder. Here are the other ingredients you will need for this recipe.

Rava-laddu-recipe-tamil-nadu-style-Ingredients

Keep a pan on the stove on low heat. This recipe is cooked till the end only on low heat, as the rava can burn easily. So try to be patient and do not increase the flame. Heat ghee and add in the cashew nuts and chironji seeds. Chironji seeds are called as saara paruppu சாரப்பருப்பு in Tamil. Fry till the cashew nuts are lightly brown.

Rava-laddu-recipe-tamil-nadu-style-roast-nuts

Add in the raisins and the freshly shredded coconut. Fry for a minute until the coconut is lightly brown.

Rava-laddu-recipe-tamil-nadu-style-fry-coconut

Now, add in the sooji rava and fry for 10 minutes. Its important that the flame is low and you keep sautéing the whole time else the rava will burn at the bottom. So all the time, eyes and hands on the pan. After 5 minutes of frying, add in the cardamom powder and the salt. The rava is fried when a nice nutty smell fills the kitchen and the rava is very slightly brown. It will roughly take about 10 minutes.

Rava-laddu-recipe-tamil-nadu-style-fry-rava

Add in the powdered sugar and mix well for 30-40 seconds. Switch off the flame.

Rava-laddu-recipe-tamil-nadu-style-add-sugar

Add in 1/4 cup of boiling hot water to the mixture and mix well to combine. Add more water if the mixture is crumbly. Dont add all of the 1/2 cup water at once. Wait for 2-3 minutes and form laddus the size you prefer. If the laddus crumble in your hand, add a couple of tablespoon of hot water to loosen the mixture.

Rava-laddu-recipe-tamil-nadu-style-fry-make-balls

Wait for the laddus to completely cool. Store the laddus in a jar with a lid. The laddus will last for 2 days at room temperature.

Rava-laddu-recipe

Rava Laddu Recipe
 
Prep time
Cook time
Total time
 
Easy Rava Laddu recipe made without milk. Its made with sooji and coconut. Its a South Indian Tamilnadu style recipe. With step by step pictures. Measurements Used - 1 cup = 250ml
Author:
Recipe type: Desserts
Cuisine: South Indian, Tamilnadu
Serves: 15
Ingredients
  • 1 Cup Chiroti Rava / Sooji
  • 1 Cup granulated Sugar, powdered in a mixie
  • ½ Cup fresh shredded Coconut
  • 3 Cardamoms, powdered fine
  • a pinch of salt
  • 1 Tablespoon Cashewnuts, chopped fine
  • 1 Tablespoon Chironji Seeds (saara paruppu)
  • 1 Tablespoon raisins
  • ¼ cup ghee
  • ½ cup water
Instructions
  1. Heat ghee in a pan and add in the cashew nuts and chironji seeds. Fry till the cashew nuts are lightly brown.
  2. Add in the raisins and the freshly shredded coconut. Fry for a minute until the coconut is lightly brown.
  3. Now, add in the sooji rava and fry for 10 minutes. The rava is fried and done when a nice nutty smell fills the kitchen and the rava is very slightly brown. It will roughly take about 10 minutes.
  4. Add in the powdered sugar and mix well for 30-40 seconds. Switch off the flame.
  5. Add in ¼ cup of boiling hot water to the mixture and mix well to combine. Add more water if the mixture is crumbly. Dont add all of the ½ cup water at once. Wait for 2-3 minutes and form laddus the size you prefer. If the laddus crumble in your hand, add a couple of tablespoon of hot water to loosen the mixture.
  6. Wait for the laddus to completely cool. Store the laddus in a jar with a lid. The laddus will last for 2 days at room temperature.

The post Rava Laddu Recipe appeared first on Kannamma Cooks.

Tomato Rice with Coconut Milk – Pressure Cooker Method

$
0
0

Tomato rice South Indian Tamilnadu style recipe #vegan #glutenfree #lunch #tomato #spicy #onepot #indian #variety-rice

I have a question for you today. A question on tomato. Ready? Here you go. Why Did The Tomato blush today morning when I was making breakfast? Do you know? I just figured that he was blushing because he saw the salad dressing. woot! woot! Now, lets move on to lunch. I am not telling what happened during lunch. hushhhh!!!!! We are making tomato rice today. This recipe is a lunch box favorite. The addition of coconut milk keeps the rice moist and tasty. We also call this as Tomato pulav. Here is how I do Tamilnadu style Tomato rice.

We will be using Basmati rice for this recipe today. Wash the rice 2-3 times in running water. Soak the rice in water and set aside.

Tomato-Rice-with-Coconut-Milk-in-Pressure Cooker-soak-rice

Heat oil in a pan and add in the spices. Fry for 10 seconds. Add in the chopped onions and the sliced green chillies. Add more green chillies if you want it spicy. Fry for a minute.

Tomato-Rice-with-Coconut-Milk-in-Pressure Cooker-temper

In the mean time, crush some garlic in a mortar and pestle. You do NOT want to puree the garlic. We need the garlic in bits. So NO garlic paste please! If you do not have a mortar and pestle, just run the garlic in a small mixie jar (pulse several times) without adding any water. You can even chop the garlic cloves finely and add it to the pan if nothing else works for you! Add in the crushed garlic and fry for a couple of minutes.

Tomato-Rice-with-Coconut-Milk-in-Pressure Cooker-garlic

Puree the tomatoes in a blender / mixie and add it to the pan. Add in the salt, chilli powder and turmeric. Fry for 3-4 minutes until the tomatoes are cooked and dry.

Tomato-Rice-with-Coconut-Milk-in-Pressure Cooker-add-tomatoes

When the tomatoes are cooking, we will make some coconut milk. Take the coconut meat from half a coconut and run it in a blender with 2 cups of water and make a very fine paste. Strain the coconut milk and set aside. Add in the coconut milk to the pan. I measured the coconut milk while adding and I had about 2 cups. For every cup of rice, we need 2 cups of liquid. I have used 1.5 cups of rice today. So we will need 3 cups of liquid. I have already added 2 cups of coconut milk. So I will need one more cup of water. Add in one cup of water and let it all come to a boil.

Tomato-Rice-with-Coconut-Milk-in-Pressure Cooker-grind-milk

In the mean time, drain the soaked rice and set aside. Once the liquid in the pan comes to a roaring boil, add in the rice. Mix well and close the lid and put the whistle weight on. Cook for 5 minutes on medium flame or for 2 whistles. Exactly 2 whistles. Switch off the flame and wait for the pressure in the cooker to release naturally. Once the pressure has released, open the lid and gently fluff up the rice.

Tomato-Rice-with-Coconut-Milk-in-Pressure Cooker-steam

Serve hot.

Tomato-Rice-with-Coconut-Milk-in-cooker

Tomato Rice with Coconut Milk made in Pressure Cooker
 
Prep time
Cook time
Total time
 
Recipe for easy Tomato Rice with Coconut Milk made in pressure cooker. South Indian Tomato rice recipe made Tamilnadu style.
Author:
Recipe type: Lunch
Cuisine: South Indian, Tamilnadu
Serves: 4
Ingredients
Measurements Used - 1 cup = 250 ml
  • 1.5 cups Basmati rice
  • 2 cups coconut milk from Half a coconut
Spices
  • 2 cardamom pods
  • 2 cloves
  • 2 sticks cinnamon
  • 2 bay leaves
Other Ingredients
  • 2 tablespoon vegetable oil
  • 2 Onions, chopped
  • 4 green chillies, slit
  • 6 cloves garlic
  • 4 very ripe tomatoes
  • 1 teaspoon salt
  • 1 teaspoon turmeric
  • 1 teaspoon red chilli powder
Instructions
  1. Heat oil in a pan and add in the spices. Fry for 10 seconds. Add in the chopped onions and the sliced green chillies. Fry for a minute.
  2. Add in the crushed garlic and fry for a couple of minutes.
  3. Puree the tomatoes in a blender / mixie and add it to the pan. Add in the salt, chilli powder and turmeric. Fry for 3-4 minutes until the tomatoes are cooked and dry.
  4. Take the coconut meat from half a coconut and run it in a blender with 2 cups of water and make a very fine paste. Strain the coconut milk and set aside. Add in the coconut milk to the pan. I measured the coconut milk while adding and I had about 2 cups. For every cup of rice, we need 2 cups of liquid. I have used 1.5 cups of rice today. So we will need 3 cups of liquid. I have already added 2 cups of coconut milk. So I will need one more cup of water. Add in one cup of water and let it all come to a boil.
  5. In the mean time, drain the soaked rice and set aside. Once the liquid in the pan comes to a roaring boil, add in the rice. Mix well and close the lid and put the whistle weight on. Cook for 5 minutes on medium flame or for 2 whistles. Exactly 2 whistles. Switch off the flame and wait for the pressure in the cooker to release naturally. Once the pressure has released, open the lid and gently fluff up the rice.
  6. Serve hot or at room temperature.

The post Tomato Rice with Coconut Milk – Pressure Cooker Method appeared first on Kannamma Cooks.

Chettinadu Thenkuzhal Murukku Recipe from Soundaram Aachi of Soundaram Snacks, Karaikudi

$
0
0

Soundaram-thenkuzhal

You go to Karaikudi and ask for Soundaram Snacks and everyone will be able to guide you. Its so famous. The big house that hosts Soundaram snacks, bustling with all kinds of Chettinad snacks being prepared by Soundaram Aachis busy team is a sight to watch. The first time I saw her, I will never forget. We had gone to get some snacks. It was around lunch time. She saw my cranky little son and she immediately knew that he was hungry. She called one of her team members and asked them to get a pachai thenkuzhal. “A very soft kind of murukku delicacy in chettinad”. The lady returned with a hot murukku and gave it to Soundaram Aachi. She gave it to my son and told “saaptu paaru raja”. Not only that. She even wiped his oily mouth with her Saree (mundhanai) after he had finished eating. I was immediately in tears. And all this was to us, strangers. How many times do you see people like this in your life? She just hugged me tight and called me in. We struck a conversation right away. What was a 10 minute break for getting snacks turned out to be a 2 hour unforgettable meeting. I told her about Kannamma Cooks and she was so happy to share this famous thenkuzhal recipe.

chettinad-thenkuzhal-murukku-Soundaram-aachi-Soundaram-snacks

This is Soundaram amma’s story. She was a typical home maker until her quiet world toppled over when her husband met with an accident and was disabled for a while. After some time, she also lost her only son in a road accident. This business became her livelihood and she worked so hard and buried all her worries making snacks day and night. The business has become so big and Soundaram is a household name in Karaikudi now. Even today, each and every product gets packed only after Soundaram Aachi does the taste testing. A very passionate, hard working, down to earth person who will make you feel that the world is a better place because of people like her. She has a grandson from her daughter and she could not stop talking about him the whole time. She is the cutest person you will ever meet in your life. So when you are in Karaikudi, you should not miss this gem of a place thats a heaven for foodies. Soundaram Snacks is located at Number 28, MGR Street, Soodamani Puram, Karaikudi – 3. Phone Number+(91)-4565-650733.

chettinad-thenkuzhal-murukku-Soundaram-snacks-karaikudi

The sight of mountains of murukku made from scratch cannot be described in words. Everything at Soundaram is made by hand.

chettinad-thenkuzhal-murukku-one

Here is how to do Thenkuzhal murukku chettinad style. There are two methods to do this recipe. One is using the traditional method where rice is soaked, dried and ground to a fine powder.
The second one is to use the store bought idiyappam flour. This is an easier method and produces equally good results.
If you are using the traditional method, follow the instructions below.
Soundaram Aachi suggests using the following variety of raw rice if you are in Tamilnadu. C.R.Pachai or IR20. If you are else where, use the raw rice variety you can get in the grocery stores.
Soak the raw rice in water for one hour. After soaking for an hour, drain the water completely and dry the rice on a cloth for 3-4 hours. The rice needs to dry in shade only. Not under the sun. Once the rice is dried and has very little moisture left, grind to a fine powder. Usually the rice is ground to a fine powder by giving it in a rice mill. If grinding at home, grind in very small quantities in a mixie until its really smooth. Once the powder is ready, sieve and set aside. If you are going to use ready made idiyappam flour, this step is not necessary.

chettinad-thenkuzhal-murukku-sieve-flour

Dry roast the urad dal in very low flame until the dal starts to smell aromatic. Do not let the dal brown. Remove off heat and allow it to cool. Once the dal is cool, grind in a mixie to a very smooth powder. Once the powder is ready, sieve and set aside.

chettinad-thenkuzhal-murukku-urad

Mix in the rice powder, dal powder and salt. My little iron man did the mixing for me. Add the ghee and water and mix into a pliable soft dough. Make little logs to fill the murukku press.

chettinad-thenkuzhal-murukku-mix

Heat oil in a pan in medium flame until hot and press the murukkus from the murukku press directly in oil. Soundaram Aachi says, that’s the secret to getting crispy light murukkus.

chettinad-thenkuzhal-murukku-two

Remove once the bubbles in oil settle down and store in an air tight container for up-to 2 weeks. My murukku was in all shapes and sizes but tasted great.

chettinad-thenkuzhal-murukku-fry

4.0 from 1 reviews
Chettinadu Thenkuzhal Murukku Recipe from Soundaram Aachi of Soundaram Snacks, Karaikudi
 
Prep time
Cook time
Total time
 
Chettinadu Thenkuzhal Murukku Recipe from Soundaram Aachi of Soundaram snacks Karaikudi, Tamilnadu. With step by step pictures.
Author:
Recipe type: Snacks
Cuisine: Tamilnadu, South Indian
Serves: 75 murukkus
Ingredients
  • 750 grams Raw Rice or Idiyappam Rice Flour
  • 300 grams Urad dal
  • 2.5 tablespoon salt
  • 4-5 tablespoon ghee
  • Water to mix
Instructions
  1. Soak the raw rice in water for one hour. After soaking for an hour, drain the water completely and dry the rice on a cloth for 3-4 hours. The rice needs to dry in shade only. Not under the sun. Once the rice is dried, grind to a fine powder. Usually the rice is ground to a fine powder by giving it in a rice mill. If grinding at home, grind in very small quantities in a mixie until its really smooth. Once the powder is ready, sieve and set aside.
  2. Dry roast the urad dal in very low flame until the dal starts to smell aromatic. Do not let the dal brown. Remove off heat and allow it to cool. Once the dal is cool, grind in a mixie to a very smooth powder. Once the powder is ready, sieve and set aside.
  3. Mix in the rice powder, dal powder and salt. Add the ghee and water and mix into a pliable soft dough. Make little logs to fill the murukku press.
  4. Heat oil in a pan in medium flame until hot and press the murukkus from the murukku press directly in oil. Soundaram Aachi says, that’s the secret to getting crispy light murukkus.
  5. Remove once the bubbles in oil settle down and store in an air tight container for upto 2 weeks. My murukku was in all shapes and sizes but tasted great.
Notes
Troubleshooting while murukku making - what can go wrong and how to rectify
If the murukku is cracking on the sides when pressed, add in a little more water to the dough and mix well.
If the murukku is hard to bite after fried, add in a tablespoon or two of ghee to the dough and mix well.
By any chance the dough becomes too soft, add in a little bit of rice flour and mix well.

The post Chettinadu Thenkuzhal Murukku Recipe from Soundaram Aachi of Soundaram Snacks, Karaikudi appeared first on Kannamma Cooks.

Soya Kheema Biryani

$
0
0

Soy-Kheema-Biryani

I generally like to cook the traditional way. I received this Havells Air Fryer last week. I was kind of skeptical as I had never made anything in an air fryer or eaten out of one. I was not convinced if it will work. I never gave an ear all these days when someone talked about an air fryer. I was of the opinion that it was just another gadget that will occupy the kitchen counter. But now that the black, good looking machine was on the kitchen counter, I wanted to know if it will work myself. I cranked up the timer and went to work. I made a batch of classic French fries to start with and I was pleasantly surprised. OK. Potatoes, air fried – Whats the big deal? Right. I hear you. Just like anyone else, I wanted to know if the air fryer will work for non-conventional recipes. I just selected my regular Soya kheema biryani recipe for the test. The kheema balls are deep fried in the recipe. But instead of deep frying, I air fried. The results were mind blowing. It was so good that my husband could not find the difference. Whats more? The family favorite recipe is now healthy too.
Here is how to do Soya Kheema Biryani using an air fryer. I use Havells air fryer and I really like it. Its simple to use, easy to clean and comes with a self timer which I really like. Here is where you can buy the air fryer.

Havells Air Fryer

Wash the Basmati rice gently 2-3 times in running water. Soak Basmati rice in water for 20 minutes. Drain the water and set aside. For every cup of rice, we use 1.5 cups of water. We used 2 cups of rice today. So we need to add 3 cups of water. You can cook the rice either in a rice cooker or a pressure cooker. If cooking in a pressure cooker, cook for exactly 2 whistles or 5 minutes. Switch off the flame and place the cooker under running water to release the pressure in the cooker. We want to cook the rice to only 75%. So do not let the pressure to release naturally. Over cooked rice may spoil the texture of the rice. If using rice cooker, follow the cooker instructions. Once the rice is cooked, fluff up the rice and let it to cool.

Soya-Kheema-Biryani-cook-rice

Now lets make kheema for the Biryani. Grind the ginger and garlic in a small mixie without adding water. Let it be crushed but not pureed. Set aside. Heat oil in a pan and add in the onions, finely chopped green chillies and half of the ginger garlic mixture. Fry till the onions are soft.

Soya-Kheema-Biryani-ginger-garlic

When the onions are cooking, soak the soya chunks in water for 3-4 minutes. Drain the water and run it in a mixie / blender until the soya chunks becomes a paste / kheema. Add up-to a cup of water while grinding. Now drain the water. You can either squeeze the soya kheema in your palm to get rid of the water or use a strainer. I have shown both the methods in the picture below. Whatever works for you, go for it.

Soya-Kheema-Biryani-grind-soya

Add in the drained soya kheema, salt and turmeric. Mix well to combine. Add in the chopped coriander leaves and mint leaves and switch off the flame. Combine well.

Soya-Kheema-Biryani-ground-masala

Break an egg and add it to the kheema and mix well. We add an egg as its a binding agent and will help in keeping the kheema from breaking while frying. You can add 2 tablespoons of besan / gram flour if you are a vegetarian and want to avoid eggs. Make little balls and place in the air fryer. Traditionally these balls are deep fried at this stage.

Soya-Kheema-Biryani-fry

Set the timer for 15 minutes and fry the kheema balls in 200 degrees Celsius temperature. Fry in batches. Do not over crowd the air fryer. You will be really pleased with the browned kheema that will come out of the fryer after 15 minutes. Balaboosta baby!

Soya-Kheema-Biryani-air-fryer

Now lets make the Gravy for the biryani.

Heat oil and ghee in a pan and add in the spices. Let the spices plump for 30 seconds. Add in the onions. Fry for 2-3 minutes. Add in the sliced green chillies, turmeric and the remainder of the crushed ginger and garlic. Fry for a minute. Add in the tomatoes and fry for a minute. Add in the chilli powder, salt and yogurt. Fry for a minute more.

Soya-Kheema-Biryani-Temper

Add in a cup of water to the pan and let it come to a boil. Add in the kheema balls and the lime juice. Gently mix to combine. Switch off the flame.

Soya-Kheema-Biryani-add-kheema

Now lets layer the biryani. I used my rice cooker pan. Add half of the kheema ball gravy on the bottom of a wide pan. Form a second layer with half of the cooked rice. Add a hand full of chopped mint leaves and chopped coriander leaves. Repeat once again. Top it with two tablespoon of ghee.
Now, Cook the layered rice mixture in a rice cooker for 10 minutes. If you don’t have a rice cooker, heat a dosa pan on the stove and put the biryani bowl with a tightly covered lid on top of the dosa pan and allow it to cook on low flame for 15 minutes.
Once its cooked, gently fluff up the biryani.

Soya-Kheema-Biryani-rice

Serve hot.

Soya-Kheema-Biryani-pic

5.0 from 1 reviews
Soya Kheema Biryani
 
Prep time
Cook time
Total time
 
Recipe for South Indian Style Soya Kheema Biryani. The kheema balls fried in air fryer instead of deep frying. Healthy recipe. Measurements Used - 1 Cup = 250ml
Author:
Recipe type: Main dish, Biryani
Cuisine: South Indian, Chettinad
Serves: 4
Ingredients
For Cooking Rice
  • 2 Cups long grain Basmati Rice
  • 3 Cups Water
For crushed ginger garlic
  • Use half of the crushed Ginger Garlic for kheema balls and the other half for gravy.
  • 15 cloves garlic
  • 3 inch piece ginger
For the Kheema Balls
  • 2 teaspoon Vegetable Oil
  • 1 onion finely chopped
  • 2 green chillies finely chopped
  • 2 cups soya chunks
  • 1 teaspoon salt
  • 1 teaspoon Turmeric
  • ¼ cup chopped coriander leaves (roughly 5 sprigs)
  • ¼ cup chopped mint leaves (roughly 15 leaves )
  • 1 Egg (or) 2 Tablespoon Besan Flour
For the Gravy
  • Spices - 2 each of cinnamon, cloves, cardamom, star Anise and bay leaf
  • 1 teaspoon Vegetable Oil
  • 1 teaspoon Ghee
  • 2 Onion, chopped
  • 3 green chillies
  • 1 teaspoon turmeric
  • 2 tomatoes, chopped
  • 1 teaspoon chilli powder
  • 1 teaspoon salt
  • ½ cup yogurt
  • 1 cup water
  • Juice of 1 lime
For layering the Biryani
  • handful of chopped coriander leaves
  • handful of chopped mint leaves
  • 2 tablespoon ghee
Instructions
For Cooking Rice
  1. Wash the Basmati rice gently 2-3 times in running water. Soak Basmati rice in water for 20 minutes. Drain the water and set aside. In a pressure cooker, cook for exactly 2 whistles or 5 minutes. Switch off the flame and place the cooker under running water to release the pressure in the cooker.Once the rice is cooked, fluff up the rice and let it to cool.
For the Kheema Balls
  1. Grind the ginger and garlic in a small mixie without adding water. Set aside. Heat oil in a pan and add in the onions, finely chopped green chillies and half of the ginger garlic mixture. Fry till the onions are soft.
  2. When the onions are cooking, soak the soya chunks in water for 3-4 minutes. Drain the water and run it in a mixie / blender until the soya chunks becomes a paste / kheema. Add up-to a cup of water while grinding. Now drain the water in a strainer.
  3. Add in the drained soya kheema, salt and turmeric. Mix well to combine. Add in the chopped coriander leaves and mint leaves and switch off the flame. Combine well.
  4. Break an egg and add it to the kheema and mix well. You can add 2 tablespoons of besan / gram flour if you are a vegetarian and want to avoid eggs. Make little balls and place in the air fryer. Set the timer for 15 minutes and fry the kheema balls in 200 degrees Celsius temperature.
For the Gravy
  1. Heat oil and ghee in a pan and add in the spices. Let the spices plump for 30 seconds. Add in the onions. Fry for 2-3 minutes. Add in the sliced green chillies, turmeric and the remainder of the crushed ginger and garlic. Fry for a minute. Add in the tomatoes and fry for a minute. Add in the chilli powder, salt and yogurt. Fry for a minute more. Add in a cup of water to the pan and let it come to a boil. Add in the kheema balls and the lime juice. Gently mix to combine. Switch off the flame.
For layering the Biryani
  1. Add half of the kheema ball gravy on the bottom of a wide pan. Form a second layer with half of the cooked rice. Add a hand full of chopped mint leaves and chopped coriander leaves. Repeat once again. Top it with two tablespoon of ghee.
  2. Now, Cook the layered rice mixture in a rice cooker for 10 minutes. If you don’t have a rice cooker, heat a dosa pan on the stove and put the biryani bowl with a tightly covered lid on top of the dosa pan and allow it to cook on low flame for 15 minutes.
  3. Once its cooked, gently fluff up the biryani.

Soya-Kheema-Biryani-havells

The post Soya Kheema Biryani appeared first on Kannamma Cooks.


Creamiest Balaboosta Hummus Recipe

$
0
0

Hummus

I have eaten many hummus but this one inspired from the Balaboosta has to be THE ONLY HUMMUS RECIPE you will ever need. I am a great fan of the Israeli born NYC chef Einat Admony. This hummus is a dynamite, divine, smooth, silky, really really oh so good. There are a few secrets to making a good hummus. Basically two things.

# Fall apart tender chickpea / garbanzo beans.
# Chickpea – Tahini ratio. (We will be making our own home made Tahini for this recipe)

Lets make this irresistible, velvety king of dips. I eat it with my toast, slather on carrots, or just take a bowl of hoomooz (I can never pronounce hummus that way. But I try!) and sit in front of the teevee. Come with me you Balaboosta!

Balaboosta (n.)(bah-lah-boo-sta) A Yiddish term meaning the perfect housewife, homemaker, wonderful mother, cook, and gracious hostess. Balaboostas love their husbands (hmm…hmm…most of the time, that is.)

So the first thing in doing this great ethereal hummus is to start soaking the dried chickpea the previous day in water and baking soda. The baking soda does the magic to get fall apart tender chickpea.

soft-and-creamy-balaboosta-hummus-chickpea

Dump the chickpeas in a large bowl and add 3/4 teaspoon baking soda. Add water till it fills the bowl and let it sit at room temperature overnight for 8-10 hours. The next day, drain. Now we need to cook the chickpea. You can cook the chickpea in a pressure cooker or in a pan.
Pressure cooker method
Add lots of water in a pressure cooker (3 cups) and add 1/2 teaspoon of baking soda. Cook for 10 whistles and switch off the flame. Wait for the pressure in the cooker to release naturally. Drain the chickpea and reserve 1/2 cup of the chickpea water. Set aside.
Pan Method
Add lots of water in a bowl (5-6 cups) and add 1/2 teaspoon of baking soda and bring to a boil. Continue to boil until the chickpeas are tender, 30 to 45 minutes. Drain the chickpeas, reserving 1/2 cup of the chickpea water. Set aside.

In both methods, let the chickpea cool completely before proceeding.

soft-and-creamy-balaboosta-hummus-cook

I made fresh Tahini paste for this recipe.  Here is how. Take a pan and dry roast the white sesame seeds on low flame until very slightly brown and fragrant.

soft-and-creamy-balaboosta-hummus-tahini

Grind it in a spice grinder / small mixie jar to a powder. Add in the olive oil and grind it into a very fine paste.

soft-and-creamy-balaboosta-hummus-tahini-grind

Now, say with me – making tahini at home is very easy! I just made enough Tahini just for this recipe.

soft-and-creamy-balaboosta-hummus-homemade-tahini

Now lets crank up the mixer to make hummus.

Combine the cooked chickpea, garlic, reserved liquid, tahini paste, lemon juice, Olive oil, salt, cumin, and pepper in a food processor / mixie and puree until really smooth and creamy. Add a little more water if the hummus is really thick. Plop the hummus on a plate or in a shallow bowl.

soft-and-creamy-balaboosta-hummus-creamy

When ready to serve, drizzle with olive oil and sprinkle with red chilli powder.

soft-and-creamy-balaboosta-hummus-recipe

Creamiest Balaboosta Hummus Recipe
 
Prep time
Cook time
Total time
 
Recipe for Creamiest Balaboosta inspired Hummus Recipe. Made with homemade Tahini. Original recipe from Balaboosta cookbook by Einat Admony.
Author:
Recipe type: Dips
Cuisine: Middle Eastern
Serves: 3 cups
Ingredients
For the Hummus
  • 1 cup dried chickpeas
  • ¾ teaspoon plus ½ teaspoon baking soda
  • ½ cup chickpea cooking liquid (drained after cooking chickpea)
  • 1 large garlic clove, finely chopped
  • 3 tablespoons freshly squeezed lemon juice
  • 2 tablespoons extra virgin olive oil
  • ¾ teaspoons salt
  • ¼ teaspoon ground cumin
  • Pinch freshly ground black pepper
For Tahini
  • ¼ cup white sesame seeds
  • 2 tablespoon extra virgin olive oil
For Garnish
  • 1 tablespoon extra virgin olive oil
  • ¼ teaspoon red chilli powder or paprika for garnish
Instructions
For Tahini
  1. Take a pan and dry roast the white sesame seeds on low flame until very slightly brown and fragrant.
  2. Grind it in a spice grinder / small mixie jar to a powder. Add in the olive oil and grind it into a very fine paste.
For Hummus
  1. Dump the chickpeas in a large bowl and add ¾ teaspoon baking soda. Add water till it fills the bowl and let it sit at room temperature overnight for 8-10 hours. The next day, drain. Now we need to cook the chickpea. You can cook the chickpea in a pressure cooker or in a pan.
  2. Pressure cooker method
  3. Add lots of water in a pressure cooker (3 cups) and add ½ teaspoon of baking soda. Cook for 10 whistles and switch off the flame. Wait for the pressure in the cooker to release naturally. Drain the chickpea and reserve ½ cup of the chickpea water. Set aside.
  4. Pan Method
  5. Add lots of water in a bowl (5-6 cups) and add ½ teaspoon of baking soda and bring to a boil. Continue to boil until the chickpeas are tender, 30 to 45 minutes. Drain the chickpeas, reserving ½ cup of the chickpea water. Set aside.
  6. Combine the cooked chickpea, garlic, reserved liquid, tahini paste, lemon juice, Olive oil, salt, cumin, and pepper in a food processor / mixie and puree until really smooth and creamy. Plop the hummus on a plate or in a shallow bowl.
  7. When ready to serve, drizzle with olive oil and sprinkle with red chilli powder.

Einat Admony-TaimNYC- Balaboosta Cookbook inspired Hummus #hummus #Israel #dip #todiefor #balaboosta #middleeastern #pita

The post Creamiest Balaboosta Hummus Recipe appeared first on Kannamma Cooks.

Rajma Masala Recipe

$
0
0

Rajma-Masala-Recipe

Have you ever met people who can go on and on and on for hours and have so much to share. My friend Ramya Sivashankar is just that. She sits right on top of my apartment. She is a great cook and a great artist. She currently lives in Chicago. She talks so fast and before you can process what she has said, you are listening to a totally different thing. She has sooooo much energy. There is definitely no dull moment when she is around. Oh! what fun! This is her moms recipe. I love the food at her place. Auntie makes her own masala and this recipe is such a winner. Here is a pic of auntie with her husband. A very wonderful cook and one of the best hosts ever.

Rajma-Masala-Recipe-pic

Here is the recipe.

We need to soak the Rajma overnight in lots of water. The next day the Rajma would have doubled in size. I used 1 cup Rajma. So I use 3 cups of water for cooking in the pressure cooker. Pressure cook the rajma with salt and water until its soft and tender. I cooked for 15 minutes in the pressure cooker. I wait for the pressure to release naturally once it is cooked. Retain the cooked water. Set aside.

Rajma-Masala-Recipe-cook-rajma

We will need to make homemade rajma masala. Here are the ingredients.

Rajma-Masala-Recipe-powder

Dry roast all the ingredients for the rajma masala powder in low flame until fragrant. It will take about 2-3 minutes. Switch off the flame and allow the mixture to cool. Grind the mixture to a fine powder. Set aside.

Rajma-Masala-Recipe-grind-masala

Heat oil in a pan and add in the cumin seeds when the oil is hot. Let the cumin seeds splutter. Grind 2 onions in a small blender to a fine paste. Add it to the oil.

Rajma-Masala-Recipe-onion-paste

Fry till the onion paste turns lightly brown. Grind tomatoes, ginger and garlic together in a small blender to a fine paste. Add it to the pan along with the salt.

Rajma-Masala-Recipe-tomato-paste

Cover the pan as the tomato paste might splutter out. Fry till the mixture is completely dry. It is very important to get the mixture completely cooked and dry. Add in the sugar, red chilli powder, turmeric and the ground homemade rajma masala powder. Fry for a minute.

Rajma-Masala-Recipe-masala

Add in the cooked Rajma with the cooking liquid if any, 2 cups of water and the coriander leaves. Cover with a lid and cook for 15 minutes on low flame. Sauté every couple of minutes so it does not scorch at the bottom. The curry will start to thicken after 10 minutes.

Rajma-Masala-Recipe-simmer

After 15 minutes, the curry should be thick. If its thin, let it cook for some more time. Switch off the flame and serve hot with roti or rice.

Rajma-Masala

Rajma Masala
 
Prep time
Cook time
Total time
 
Home style Recipe for Rajma Masala - Rajma Chawal. Made with home made masala powder. Can be served with roti or rice.
Author:
Recipe type: Curry
Cuisine: North Indian
Serves: 4
Ingredients
For Cooking Rajma
  • 1 Cup Rajma
  • 3 cups water
  • 1 teaspoon salt
For Homemade Rajma Masala Powder
  • 2 teaspoon Coriander Seeds
  • 2 cloves
  • 2 small bits of Star Anise
  • 1 Marathi Moggu
  • 1 teaspoon Cumin seeds
  • 1 teaspoon Black Pepper
  • 2 cardamom
  • 1 inch Cinnamon stick
  • 1 teaspoon fennel seeds
For the curry
  • 1 tablespoon Vegetable Oil
  • 1 teaspoon Cumin seeds
  • 2 Red Onions
  • 2 Tomatoes
  • 6 cloves Garlic
  • 1 inch piece ginger, peeled
  • 1 teaspoon salt
  • 1 teaspoon sugar
  • 1 teaspoon Red chilli powder
  • 1 teaspoon Turmeric
  • 3 sprigs Coriander leaves, chopped
Instructions
For Cooking Rajma
  1. We need to soak the Rajma overnight in lots of water. The next day the Rajma would have doubled in size. I used 1 cup Rajma. So I use 3 cups of water for cooking in the pressure cooker. Pressure cook the rajma with salt and water until its soft and tender. I cooked for 15 minutes in the pressure cooker. I wait for the pressure to release naturally once it is cooked. Retain the cooked water. Set aside.
For Homemade Rajma Masala Powder
  1. Dry roast all the ingredients in low flame until fragrant. It will take about 2-3 minutes. Switch off the flame and allow the mixture to cool. Grind the masalas to a fine powder.
For the curry
  1. Heat oil in a pan and add in the cumin seeds when the oil is hot. Let the cumin seeds splutter. Grind 2 onions in a small blender to a fine paste. Add it to the oil.
  2. Fry till the onion paste turns lightly brown. Grind 2 tomatoes, ginger and garlic together in a small blender to a fine paste. Add it to the pan along with the salt.
  3. Cover the pan as the tomato paste might splutter out. Fry till the mixture is completely dry. It is very important to get the mixture completely cooked and dry. Add in the sugar, red chilli powder, turmeric and the ground homemade rajma masala powder. Fry for a minute.
  4. Add in the cooked Rajma with the cooking liquid if any, add 2 cups of water and the coriander leaves. Cover with a lid and cook for 15 minutes on low flame. Sauté every couple of minutes so it does not scorch at the bottom. The curry will start to thicken after 10 minutes.
  5. After 15 minutes, the curry should be thick. If its thin, let it cook for some more time. Switch off the flame and serve hot with roti or rice.

The post Rajma Masala Recipe appeared first on Kannamma Cooks.

Falafel recipe

$
0
0

Taim NYC inspired Falafel recipe #falafel #Taim #foodtruck #taimmobile #falafel #Israel #falafel #yummy #vegan #glutenfree #healthy

I like falafels. I am sure its the brother of the Indian lentil Vadas. Falafels are so versatile. We make falafel burgers at home and they are out of this world. Click here for the Falafel burger recipe. This middle eastern staple is so loaded with protein and its tastes so good that you wont miss the meat. Makes it perfect for #meatlessmondays. This recipe has been inspired from the NYC Food Truck Taim Mobile.

Dump the chickpeas in a large bowl and add 1/2 teaspoon baking soda. Add water till it fills the bowl and let it sit at room temperature overnight for 8-10 hours. The next day, drain.

soft-and-creamy-balaboosta-hummus-soak-chickpea

Chop the greens ( I use coriander leaves, mint leaves and parsley) roughly. Set aside. Add in the rest of the ingredients along with the greens. Basically dump all the ingredients in your mixer. Work in batches if necessary. You need to grind the mixture to a slightly coarse paste. Do not add any water while grinding. For every pulse in your mixer, open the jar and slightly mix everything so the mixture gets ground evenly. Resist your urge to add water. Once you feel that the mixture has become a coarse paste, Set aside. The coarse texture is important for this recipe.

soft-and-creamy-balaboosta-hummus-grind-chickpea

Make small balls using your palm. Shape the mixture into 1½ inch balls and set aside. Make sure not to pack or press too hard in-between your hands. Heat oil in a pan and add the falafel balls when the oil is hot. Do not disturb the oil for the first minute. The falafel mixture is very fragile and may break open if you try to maneuver them in oil. After a minute, try to turn the falafels. Cook the falafels till its brown. Make sure to work in small batches to keep your oil nice and hot, which keeps your falafel tender and crispy.

falafel-fry

Serve the falafels with hummus.

falafel

Falafel recipe
 
Prep time
Cook time
Total time
 
Recipe for the middle eastern falafels. Made from scratch. No fillers used. Authentic recipe inspired from NYC food truck Taim Mobile.
Author:
Recipe type: Appetizer
Cuisine: Middle Eastern
Serves: 20 falafels
Ingredients
  • 1½ cups dried chickpeas, soaked in cold water overnight
  • 1 medium onion, coarsely chopped
  • 3 garlic cloves, coarsely chopped
  • ½ cup coriander leaves (6-7 sprigs), coarsely chopped
  • ½ cup parsley (6-7 sprigs), coarsely chopped
  • ¼ cup mint leaves (4-5 sprigs), coarsely chopped
  • 1½ teaspoons salt
  • 1 tablespoon coriander powder
  • ½ teaspoon ground cumin powder
  • ½ teaspoon freshly ground black pepper
  • 2 green chillies (optional)
  • Vegetable Oil / Canola oil for deep frying
Instructions
  1. Dump the chickpeas in a large bowl and add ½ teaspoon baking soda. Add water till it fills the bowl and let it sit at room temperature overnight for 8-10 hours. The next day, drain.
  2. Chop the greens ( I use coriander leaves, mint leaves and parsley) roughly. Set aside. Add in the rest of the ingredients along with the greens. Basically dump all the ingredients in your mixer. Work in batches if necessary. You need to grind the mixture to a slightly coarse paste. Do not add any water while grinding. For every pulse in your mixer, open the jar and slightly mix everything so the mixture gets ground evenly. Resist your urge to add water. Once you feel that the mixture has become a coarse paste, Set aside. The coarse texture is important for this recipe.
  3. Make small balls using your palm. Shape the mixture into 1½ inch balls and set aside. Make sure not to pack or press too hard in-between your hands. Heat oil in a pan and add the falafel balls when the oil is hot. Do not disturb the oil for the first minute. The falafel mixture is very fragile and may break open if you try to maneuver them in oil. After a minute, try to turn the falafels. Cook the falafels till its brown. Make sure to work in small batches to keep your oil nice and hot, which keeps your falafel tender and crispy.
  4. Serve the falafels with hummus.

The post Falafel recipe appeared first on Kannamma Cooks.

Falafel Burger

$
0
0

falafel-burger-recipe

I love burgers. I get a burger craving every now and then. The messy dripping, juicy patties, I love it all. This home made falafel burger is dynamite. The falafel patties are air fried using an air fryer and that makes it even healthier too. If you do not have an air fryer, you can shallow fry the patties in oil. The patty is so meaty and really really flavorful. Lets ride into flavor town!

You can find the deep fried Falafel recipe here.

Dump the chickpeas in a large bowl and add 1/2 teaspoon baking soda. Add water till it fills the bowl and let it sit at room temperature overnight for 8-10 hours. The next day, drain.

soft-and-creamy-balaboosta-hummus-soak-chickpea

Chop the greens ( I use coriander leaves, mint leaves and parsley) roughly. Set aside. Add in the rest of the ingredients along with the greens. Basically dump all the ingredients in your mixer. Work in batches if necessary. You need to grind the mixture to a slightly coarse paste. Do not add any water while grinding. For every pulse in your mixer, open the jar and slightly mix everything so the mixture gets ground evenly. Resist your urge to add water. Once you feel that the mixture has become a coarse paste, Set aside. The coarse texture is important for this recipe.

soft-and-creamy-balaboosta-hummus-grind-chickpea

Make a 3-4 inch patties out of the mixture and place it in the air fryer. Set the timer for 15 minutes and fry the patties at 200 degrees Celsius temperature. Fry in batches. Do not over crowd the air fryer. Set aside.
You know what? We did not use even a smidgen of oil for frying the patties. Isn’t that great. The patties turn out crispy and crunchy and go so well inside the burgers.

You can shallow fry the patties if you do not have an air fryer.

falafel-burger-air-fried

Now lets make a simple Israeli salad for the burgers. Mix all the finely chopped ingredients listed under Israeli salad and set aside.

falafel-burger-saladAssembling the Burgers
# Toast the burger buns on each side with a little butter.
# Spread a tablespoon of Hummus.
# Spread a tablespoon of the Israeli salad
# Place the patty
# Spread a tablespoon of Mayo
# Top it off with the toasted bun
# Enjoy!

falafel-burger-assemble

Never miss the meat!

falafel-burger-recipe-big-bite

Falafel Burgers
 
Prep time
Cook time
Total time
 
Falafel burger recipe made with home made falafel patty from scratch. Served with hummus, Israeli salad and a creamy mayo.
Author:
Recipe type: Burgers
Cuisine: American / Middle Eastern
Serves: 6 patties
Ingredients
For the Falafel Patties
  • 1½ cups dried chickpeas, soaked in cold water overnight with ½ teaspoon baking soda
  • 1 medium onion, coarsely chopped
  • 3 garlic cloves, coarsely chopped
  • ½ cup coriander leaves (6-7 sprigs), coarsely chopped
  • ½ cup parsley (6-7 sprigs), coarsely chopped
  • ¼ cup mint leaves (4-5 sprigs), coarsely chopped
  • 1½ teaspoons salt
  • 1 tablespoon coriander powder
  • ½ teaspoon ground cumin powder
  • ½ teaspoon freshly ground black pepper
  • 2 green chillies (optional)
For the Israeli Salad
  • 1 tomato, finely chopped
  • 1 small cucumber, finely chopped
  • 3 sprigs parsley, finely chopped
  • Juice of a lime
  • ⅓ teaspoon salt
Other Ingredients for Burger Assembly
  • 6 Burger Buns, (optional - toast the buns with butter)
  • ⅓ cup Store bought Mayonnaise
  • ⅓ cup Homemade Hummus / Store bought is fine
Instructions
For the Falafel Patties
  1. Dump the chickpeas in a large bowl and add ½ teaspoon baking soda. Add water till it fills the bowl and let it sit at room temperature overnight for 8-10 hours. The next day, drain.
  2. Chop the greens ( I use coriander leaves, mint leaves and parsley) roughly. Set aside. Add in the rest of the ingredients along with the greens. Basically dump all the ingredients in your mixer. Work in batches if necessary. You need to grind the mixture to a slightly coarse paste. Do not add any water while grinding. For every pulse in your mixer, open the jar and slightly mix everything so the mixture gets ground evenly. Resist your urge to add water. Once you feel that the mixture has become a coarse paste, Set aside. The coarse texture is important for this recipe.
  3. Make a 3-4 inch patties out of the mixture and place it in the air fryer. Set the timer for 15 minutes and fry the patties at 200 degrees Celsius temperature. Fry in batches. Do not over crowd the air fryer. Set aside. Your Zero Oil Patties are ready.
For the Israeli Salad
  1. Mix all the finely chopped ingredients listed under Israeli salad and set aside.
Burger Assembly
  1. # Toast the burger buns on each side with a little butter.
  2. # Spread a tablespoon of Hummus.
  3. # Spread a tablespoon of the Israeli salad
  4. # Place the patty
  5. # Spread a tablespoon of Mayo
  6. # Top it off with the toasted bun
  7. # Enjoy!

The post Falafel Burger appeared first on Kannamma Cooks.

South Indian Beetroot Rasam Recipe

$
0
0

South Indian Beet Broth. Excellent cold remedy #vegan #glutenfree #broth #beet #homeremedy

This is a very typical Tamilnadu rasam. Everyday in the south Indian household, when we steam vegetables in the cooker for poriyal (stir-fry), a little bit of cooking liquid – broth will be left behind. The broth will not be wasted but added to that days curry. But beetroot liquid cant be added as beetroot liquid is very strong on its own. Not to mention the strong color. So we make a rasam out of it. My friend Abirambika became such a fan of this recipe that I remember her every time I make it.

Steam the beetroot in a cooker and drain the broth. Set aside. Use the steamed beetroot to make poriyal. Here are the recipes you can make with the steamed Beetroot.
Beetroot Poriyal with Almond Powder
South Indian Beetroot Poriyal

South-indian-beetroot-rasam-steam

Get the following powders ready.

South-indian-beetroot-rasam-masala

Soak half a lime size tamarind in a cup of water for 20 minutes. Squeeze and extract all the juices. Set aside.
Heat oil in a pan. When the oil is hot, add in the mustard seeds and cumin seeds. Let it splutter. Add in the crushed garlic and the red chillies and fry for 30 seconds. Add in the chopped onions and fry till the onions are soft. Add in the Rasam masala powders, salt and the tamarind extract. Let it boil for 3 minutes.

South-indian-beetroot-rasam-tamarind

When the tamarind extract has cooked, add in the beetroot cooking liquid. Add in the curry leaves, coriander leaves and the green chillies. Let it briefly simmer for a minute. Do not cook for long after adding the beetroot liquid.

South-indian-beetroot-rasam-boil

Switch off the flame and serve hot with rice.

South-indian-beetroot-rasam-recipe

South Indian Beetroot Rasam Recipe
 
Prep time
Cook time
Total time
 
South Indian Beetroot Rasam Recipe. Easy Tamilnadu style recipe. Excellent home remedy for cold.
Author:
Recipe type: Rasam
Cuisine: South Indian
Serves: 3
Ingredients
For Beetroot Broth
  • 500 grams Beetroot
  • 1 cup water
For the Rasam Powder Masala
  • 1 teaspoon Dry ginger powder (sukku)
  • 1 teaspoon cumin powder
  • 1 teaspoon freshly ground black pepper powder
  • ½ teaspoon turmeric
For the tamarind extract
  • half a lime size tamarind
  • 1 cup water
Other Ingredients
  • 2 teaspoon vegetable oil
  • ¼ teaspoon black mustard seeds
  • ¼ teaspoon cumin seeds
  • 3 cloves Garlic, crushed
  • 2 dried red chillies, preferably gundu variety
  • ½ of a red onion
  • 1 teaspoon salt
  • 3 green chillies
  • 2 sprigs curry leaves
  • 3 sprigs coriander leaves, chopped
Instructions
  1. Steam the beetroot in a cooker and drain the broth. Set aside. Use the steamed beetroot to make poriyal.
  2. Soak half a lime size tamarind in a cup of water for 20 minutes. Squeeze and extract all the juices. Set aside.
  3. Heat oil in a pan. When the oil is hot, add in the mustard seeds and cumin seeds. Let it splutter. Add in the crushed garlic and the red chillies and fry for 30 seconds. Add in the chopped onions and fry till the onions are soft. Add in the Rasam masala powders and the tamarind extract. Let it boil for 3 minutes.
  4. When the tamarind extract has cooked, add in the beetroot cooking liquid. Add in the curry leaves, coriander leaves and the green chillies. Let it briefly simmer for a minute. Do not cook for long after adding the beetroot liquid.
  5. Switch off the flame and serve hot with rice.

The post South Indian Beetroot Rasam Recipe appeared first on Kannamma Cooks.

Viewing all 1073 articles
Browse latest View live