 Spicy egg curry Nanjil style. Perfect egg curry recipe to be served with rice. Tamilnadu style egg curry recipe. With step by step pictures.
This recipe again is from my mom’s newspaper cuttings dating many years back. She likes to save recipes from magazines / papers that she finds interesting and keeps it for me. This is one such gem. She takes a lot of joy in sharing these things with me. This recipe for nanjil egg curry goes so well along with rice. I have adapted the recipe making minimal changes to suit my family.
Nanjil country represents the southern part of Tamilnadu.

Here is how to do spicy egg curry for rice.
Heat oil in a pan and add in the bay leaves, curry leaves, kal pasi (stone flower) and cumin seeds. Saute for a minute on low flame.

Once the spices are sauteed and aromatic, add in the sliced onions.

When the onions are getting brown, lets make a spice masala paste.

Grind all the ingredients with quarter cup of water to a fine paste. Add in the spice masala paste.

Add in the salt. Adding salt will help in cooking faster and the masala paste will not stick to the pan. Fry well for 2-3 minutes.

Add in the chopped tomatoes and saute for a minute.

Add in the turmeric powder, coriander powder and red chilli powder and saute for 2-3 minutes till the masala is well fried and almost dry.

Now, we will make another paste.

Grind the fresh shredded coconut, cashew-nut and fried gram with quarter cup of water to a smooth paste.

Add the paste along with two cups of water.

Add in the boiled eggs to the curry. Let the curry simmer for 10 minutes.

Remove the pan from heat and add in the coriander leaves and the lemon juice.

Spicy curry for rice is ready!!!! Serve the curry with red rice.


- 1 tablespoon sesame oil (Indian gingely oil)
- 2 sprigs curry leaves
- 2 bay leaves, broken
- 1 teaspoon kalpasi
- ½ teaspoon cumin seeds
- 1 onion, sliced
- 1 tomato, chopped
- 1 teaspoon salt
- 1 teaspoon coriander powder
- ½ teaspoon red chilli powder
- ¼ teaspoon turmeric powder
- 2 sprigs coriander leaves, chopped
- juice of half a lime / lemon
- 5 eggs, boiled and peeled
- 5 cloves garlic
- ½ inch piece ginger
- 3 green chillies
- ½ inch piece cinnamon stick
- 1 cardamom
- 1 clove
- 1 teaspoon fennel seeds
- ⅓ cup fresh shredded coconut
- 5 cashewnut
- 2 teaspoon fried gram dal (pottukadalai)
- Heat oil in a pan and add in the bay leaves, curry leaves, kal pasi (stone flower) and cumin seeds. Saute for a minute on low flame.
- Once the spices are sauteed and aromatic, add in the sliced onions and saute till the onions are slightly brown..
- Add in the spice masala paste. Add in the salt. Saute for 2-3 minutes.
- Add in the chopped tomatoes and saute for a minute.
- Add in the turmeric powder, coriander powder and red chilli powder and saute for 2-3 minutes till the masala is well fried and almost dry.
- Add the coconut masala paste along with two cups of water.
- Add in the boiled eggs to the curry. Let the curry simmer for 10 minutes.
- Remove the pan from heat and add in the coriander leaves and the lemon juice.
- Serve the curry with red rice.
The post Nanjil Egg curry , Nanjil naatu egg kari recipe appeared first on Kannamma Cooks.
 Healthy kollu dosai recipe. Dosa made with cooked and ground horsegram and spices. Healthy and filling dosa recipe. With step by step pictures.


 Peerkangai Thol Chutney Recipe. Ridgegourd Peel is often discarded but can be made into a very delicious chutney. Recipe with step by step pictures.


 Chola dosai and chola idli batter recipe. How to make fermented sorghum idli-dosa batter. Recipe with step by step pictures.


 Stuffed bread rolls recipe. These Indian style fried potato stuffed bread rolls are delicious in every single bite. With step by step pictures.
 Here is how to do stuffed bread rolls.


 Now lets stuff it in bread.


 Troubleshooting: If the stuffing break opens, just pinch that area so the wet bread closes the opening. Make sure it is smooth all around.


 Mushroom kuzhambu / kulambu for idli and dosa. Easy Tamilnadu style Kaalan kuzhambu recipe to be served with idli and dosa. With step by step pictures.


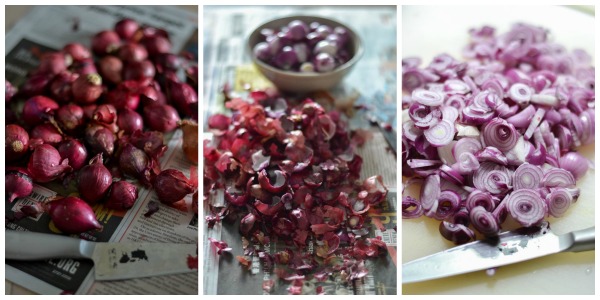
 Recipe for Tamilnadu style chinna vengayam kodhi chutney. Small onion (Indian Shallot) chutney made with shallots simmered in tomatoes and spices. Recipe with step by step pictures.


 Recipe for making brown rice kara kozhukattai. A different variety of kara kozhukattai made with brown rice.


 Recipe for ellu urundai. Sesame laddu made with black sesame seeds, roasted peanuts and jaggery. Very special sweet in the kongunadu region.
 Here is how to do Ellu Urundai!

 To make the urundai


 Recipe for coconut chutney hotel style. White coconut chutney for idli and dosa. South Indian Tamilnadu style white coconut chutney. Thengai Chutney Recipe.
 For the tadka / tempering


 Recipe for bas saaru and palya. Curry made with veggie stock and vegetable stir fry. Karnataka style bas saaru and palya recipe.
 First we will make the bas saaru
 For the bas saaru Masala
 Cooking the bas saaru


 For the cabbage palya


 Recipe for ragi mudde. Ragi Balls made with finger millet flour. Ragi Mudde (Kannada: ರಾಗಿ ಮುದ್ದೆ) Ragi Sangati (Telugu: రాగి సంగటి) Ragi kali (Tamil: ராகி களி) . With step by step pictures.


 Keerai Vadai made with greens and soaked and ground urad dal. Crisy and crunchy keerai vadai recipe. Perfect tea time snack. Recipe with step by step pictures.


 . Famed Indian cookbook author Madhur Jaffrey mentions asafoetida as the Indian truffle. Truffle or not, it has a precious place in the Indian kitchen.


 Recipe for Paya – Veg version. Delicious served with idli. Recipe for veg paya with step by step pictures.
 For the Veg Paya Masala
 Making Veg Paya


 Recipe for Spicy Nethili Meen Varuval, Deep fried Anchovies – நெத்திலி மீன் வறுவல். Anchovies marinated in a Tamil style masala with spices and herbs and deep fried. Crispy and crunchy Nethili Meen Fry recipe.


 Review of wonderchef soup maker with recipe. Recipe post in soup maker with step by step pictures.
 The Five Modes


 Recipe for coriander thokku. Sweet and tangy kothamalli thokku Tamilnadu style. Perfect accompaniment for chapati and dosa. I even spread it on toast.


 Keeping it real!!!!! The stove is going to be messy after all the splatter that happens. Cleaning the stove just after cooking the thokku makes for easy cleaning. If it dries out, it is going to take more time to clean. So clean immediately.
